

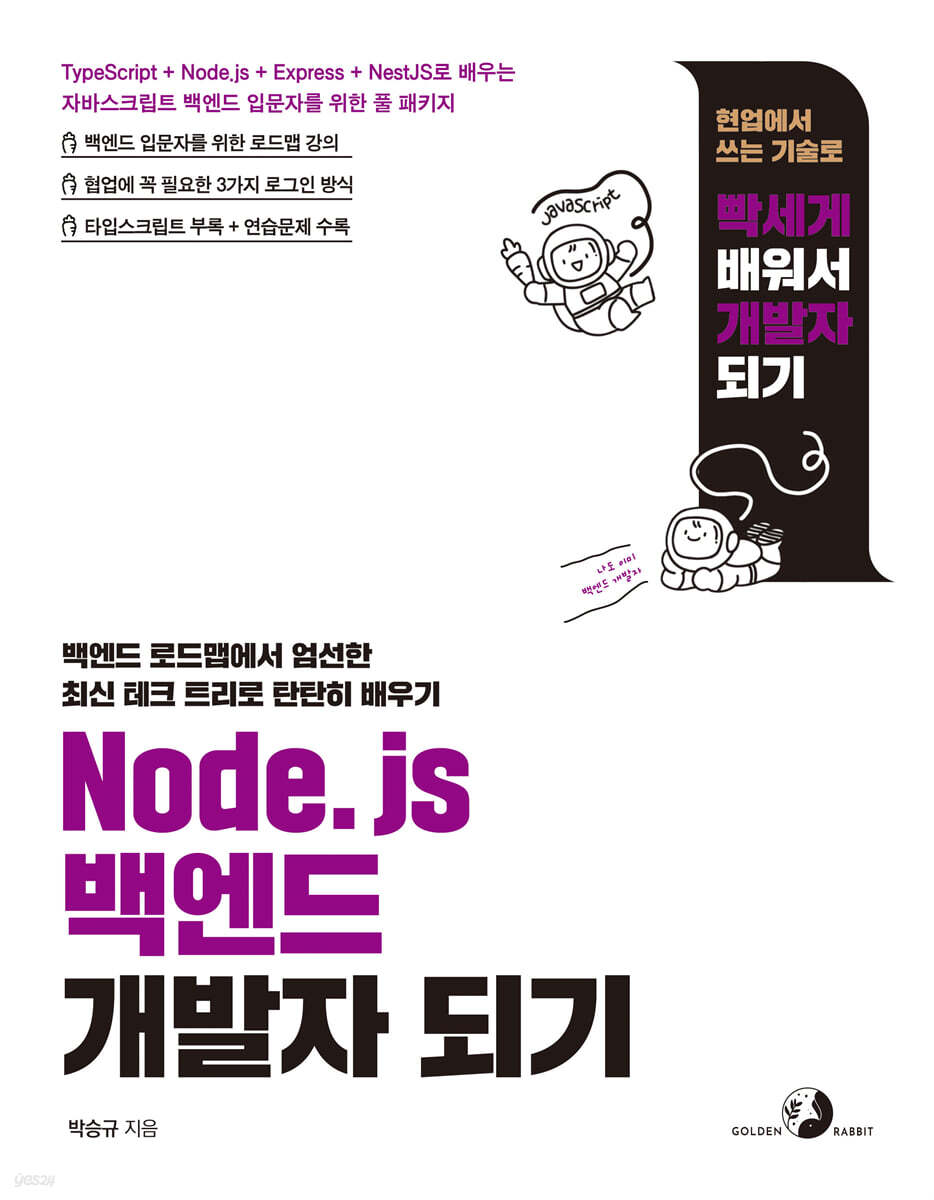
Become a Node.js Backend Developer
 |
Description
Book Introduction
- If you want to become a JavaScript Node.js backend developer
- HTML/CSS/JavaScript, then be sure to check it out
To grow into a skilled developer, the beginning is important.
So, this book explains the essential knowledge of backend development to beginners who are unsure where to start, focusing on a learning roadmap.
Next, we will teach you backend technologies that are useful in practice and in line with the latest trends by utilizing the three essential JavaScript-based backend development tools: TypeScript language, Node.js runtime, Express, and NestJS web frameworks.
We provide robust and useful information on everything from bulletin boards with search, comment, and pagination features to real-time communication chat projects with chat room functionality.
Practice problems are included at the end of each chapter to help you review what you've learned.
This book will serve as a solid compass on your journey as a backend developer.
- HTML/CSS/JavaScript, then be sure to check it out
To grow into a skilled developer, the beginning is important.
So, this book explains the essential knowledge of backend development to beginners who are unsure where to start, focusing on a learning roadmap.
Next, we will teach you backend technologies that are useful in practice and in line with the latest trends by utilizing the three essential JavaScript-based backend development tools: TypeScript language, Node.js runtime, Express, and NestJS web frameworks.
We provide robust and useful information on everything from bulletin boards with search, comment, and pagination features to real-time communication chat projects with chat room functionality.
Practice problems are included at the end of each chapter to help you review what you've learned.
This book will serve as a solid compass on your journey as a backend developer.
- You can preview some of the book's contents.
Preview
index
[Level 1 Introduction to Backend Developers]
Chapter 00 Setting up the development environment
_0.1 Setting up a Windows development environment
__0.1.1 Node.js Installation
Install __0.1.2 Git
__0.1.3 Install Visual Studio Code
_0.2 Setting up a macOS development environment
__0.2.1 Node.js Installation
Install __0.2.2 Git
__0.2.3 Install Visual Studio Code
_0.3 Setting up a Linux development environment
__0.3.1 Node.js Installation
Install __0.3.2 Git
__0.3.3 Install Visual Studio Code
_0.4 Download the example source code
_0.5 Running the downloaded source code with VSCode
_0.6 VSCode Beginner's Guide
Running the __0.6.1 code
Debugging __0.6.2
__0.6.3 VSCode shortcuts
Chapter 1: Useful Knowledge for Backend Developers
_1.1 What Backend Developers Need to Know
_1.2 Backend Developer's Duties
_1.3 Backend Architecture
_1.4 Backend Programming Language
_1.5 database
__1.5.1 RDB
__1.5.2 NoSQL (Not Only SQL)
_1.6 Cloud Services
_1.7 JavaScript Ecosystem
__1.7.1 Package Manager
__1.7.2 Build Tools
__1.7.3 Development Tools
__1.7.4 Web Framework
__1.7.5 Backend Development Environment
__1.7.6 Infrastructure
_Learning completion
_Practice problems
[Level 2: Getting Started with Backend with Node.js and Express]
Chapter 2: Getting Started with Backend with Node.js
_2.1 Introduction to Node.js
_2.2 How does Node.js execute JavaScript on the server?
__2.2.1 Components of Node.js
__2.2.2 V8 engine for JavaScript execution
__2.2.3 Event loop and operating system asynchronous API and
libuv with thread pool support
__2.2.4 Node.js Architecture
_2.3 Technical Features of Node.js
__2.3.1 Single thread
__2.3.2 Event-driven architecture
__2.3.3 Event Loop
_2.4 Is Node.js worth using?
_2.5 My first Node.js server program
__2.5.1 Create and run the hello.js file
__2.5.2 Download and test curl
_2.6 Performance testing to see if requests are truly processed concurrently
__2.6.1 K6 Installation
__2.6.2 Writing Performance Test Scripts with K6
_Learning completion
_Practice problems
Chapter 3: Implementing a Web Application Server with Node.js and Express
_3.1 Creating a server that returns OK
_3.2 Creating a Router
_3.3 Refactoring createServer( )
_3.4 Responding Dynamically
_3.5 Refactoring the Router
_3.6 Using the Express Framework
__3.6.1 Installing Express
__3.6.2 Creating My First Express Server
__3.6.3 Implementing a server made with Node.js libraries using Express
_3.7 Creating a Simple API Server with Express
__3.7.1 Writing Bulletin Board API Code
__3.7.2 Implementing a server that complies with API rules
_3.8 Testing the Bulletin Board API
__3.8.1 Calling GET with curl
__3.8.2 Posting a post by calling POST with curl
__3.8.3 Deleting a post by calling DELETE with curl
_Learning completion
_Practice problems
Chapter 4: Managing Packages with npm and yarn
_4.1 Introducing npm
_4.2 Packages and Modules
_4.3 Create a package.json file
_4.4 Installing, updating, and removing packages
Installing the __4.4.1 package
__4.4.2 Update the package
__4.4.3 Checking installed packages
__4.4.4 Deleting the package
_4.5 Script Functions and NPX
__4.5.1 Defining an npm script file
__4.5.2 Running the prettier code formatting command with NPX
_4.6 Package Locking
_4.7 yarn alternative to npm
_Learning completion
_Practice problems
Chapter 5: Asynchronous Processing in JavaScript
_5.1 Introduction to JavaScript Asynchronous
_5.2 Introducing callback functions
_5.3 Promise Object
__5.3.1 Calling multiple Promise objects simultaneously
__5.3.2 Handling Promise Exceptions
__5.3.3 Problems with Promises
_5.4 async await syntax
_Learning completion
_Practice problems
Chapter 6: Using MongoDB, a NoSQL Database
_6.1 Introduction to MongoDB
__6.1.1 Database Basic Terminology
__6.1.2 MongoDB Features
_6.2 Setting up MongoDB Atlas
_6.3 Creating a MongoDB CRUD API
_6.4 Checking Data with MongoDB Compass
_6.5 Creating CRUD using Mongoose
__6.5.1 Installing Mongoose
__6.5.2 Creating a schema with Mongoose
__6.5.3 Creating a CRUD API with Mongoose and Express
_6.6 Testing the API with a REST Client
_Learning completion
_Practice problems
Chapter 7: Creating a Paginated Bulletin Board
_7.1 Introduction to Project Structure
_7.2 Bulletin Board Project Setup
__7.2.1 Initial setup of Node.js project
__7.2.2 Installing Express and Setting Up the Project Directory Structure
__7.2.3 Installing and Configuring the Handlebars Template Engine
_7.3 Screen Planning
__7.3.1 List screen planning
__7.3.2 Writing Screen Planning
__7.3.3 Detailed screen planning
_7.4 Creating UI Screens
__7.4.1 Creating a list UI
__7.4.2 Creating a Writing UI
__7.4.3 Creating a Detail Page UI
_7.5 Creating an API
__7.5.1 Creating a Utility for Connecting to MongoDB
__7.5.2 Creating a Handlebars Custom Helper for Use in UI Pages
__7.5.3 Setting up nodemon
__7.5.4 Creating a Writing API
__7.5.5 Creating a List API
__7.5.6 Creating a Detail Page API
__7.5.7 Post Edit API
__7.5.8 Delete Post API
__7.5.9 Add Comment API
__7.5.10 Comment Deletion API
_Learning completion
_Practice problems
Jumping to the Level 3 NestJS Framework
Chapter 8: Getting Started with NestJS
_8.1 Why do we need NestJS?
_8.2 Introduction to NestJS
__8.2.1 Comparing Express and NestJS
__8.2.2 NestJS Overview
_8.3 Installing and Running NestJS
__8.3.1 Installing Dependency Packages
__8.3.2 Setting up TypeScript
__8.3.3 Creating NestJS modules and controllers
__8.3.4 Running the hello-nest app
__8.3.5 NestJS Naming Conventions
_8.4 Creating a Web API with NestJS
__8.4.1 Project Creation and Configuration
__8.4.2 Creating a Controller
__8.4.3 Writing a Blog API
__8.4.4 Creating an API that stores data in memory
__Upgrading the API to store information in 8.4.5 files
_8.5 Dependency Injection
_8.6 Connecting to MongoDB
__8.6.1 Installing dependencies
__8.6.2 Creating a schema
__8.6.3 Adding a repository using MongoDB
__8.6.4 Service Code Change
__8.6.5 Adding MongoDB settings and provider settings to the module
_Learning completion
_Practice problems
Chapter 9: Setting NestJS Environment Variables
_9.1 Introduction to Environment Variables
_9.2 Creating and Setting Up a Project
_9.3 Setting up and testing NestJS
__9.3.1 Setting ConfigModule in app.module.ts
__9.3.2 Creating a .env file
__9.3.3 Add code to app.controller.ts
__9.3.4 Testing
_9.4 Setting ConfigModule as a global module
__9.4.1 Setting environment variables in .env
__9.4.2 Creating a weather module
__9.4.3 Testing with a handler function for testing the weather API
_9.5 Using Multiple Environment Variable Files
__9.5.1 Modify the script to start the server according to the environment
__9.5.2 Create local, dev, and prod environment variables
__9.5.3 Modify the settings to use different environment variable files depending on the environment variable
__9.5.4 Testing with a test handler function
_9.6 Using a custom configuration file
__9.6.1 Creating an environment variable file
__9.6.2 Adding load options to ConfigModule
__9.6.3 Testing reading custom environment variables
_9.7 Learn the order of server startup and configuration file initialization
_9.8 Setting environment variables using a YAML file
__9.8.1 Installing js-yaml
__9.8.2 Creating a config.yaml file
__9.8.3 Modify config.ts
__9.8.4 Testing with a test handler function
_9.9 Using the cache option
_9.10 Using extended variables
__9.10.1 Additional settings to enable use of extended variables
__9.10.2 Testing with a test handler function
_9.11 Using environment variables in main.ts
_Learning completion
_Practice problems
Chapter 10: Signing Up and Verifying Membership
_10.1 Setting up a practice project
__10.1.1 Creating a project with nest-cli
__10.1.2 Creating a User Module
__10.1.3 Setting up a SQLite database
_10.2 Creating entities, services, and controllers for the user module
__10.2.1 Creating an Entity
__10.2.2 Creating a Controller
__10.2.3 Creating a Service
Testing __10.2.4
_10.3 Validating with Pipes
__10.3.1 Setting up a global ValidationPipe
__10.3.2 Creating UserDto
__10.3.3 Testing
_10.4 Creating an Authentication Module and Signing Up
__10.4.1 Creating and Configuring an Authentication Module
__10.4.2 Creating a member registration method
__10.4.3 Checking tables with the sqlite extension
_10.5 Implementing Authentication Using Cookies
__10.5.1 Creating Email and Password Verification Logic in AuthService
__10.5.2 Checking if authenticated using guard
_10.6 Implementing Authentication Using Passport and Session
__10.6.1 Library Installation and Configuration
__10.6.2 Implementing a guard for login and authentication
__10.6.3 Implementing a session serializer that stores and reads information in a session
__10.6.4 Creating a LocalStrategy file with email and password authentication logic
__10.6.5 Add settings to auth.module.ts
Testing __10.6.6
__10.6.7 Sequence of login and session storage
_Learning completion
_Practice problems
Chapter 11: Authenticating Google Login Using OAuth
_11.1 Introduction to OAuth
__11.1.1 OAuth Protocol Flow
__11.1.2 Flow for reissuing access tokens
_11.2 Preparing to Use Google OAuth
__11.2.1 Creating a Project in Google Cloud
__11.2.2 Creating an OAuth consent screen
__11.2.3 Creating an OAuth client ID and password
_11.3 Google OAuth Implementation Sequence
_11.4 Adding a NestJS configuration file
_11.5 Creating a Google OAuth Strategy
_11.6 Creating GoogleAuthGuard
_11.7 Adding a handler method to the controller
__11.7.1 Testing
_11.8 Modifying the User Entity File
_11.9 Adding Google user search and storage methods to UserService
_11.10 Applying a method to save Google users to GoogleStrategy
_11.11 Change to use sessions in GoogleAuthGuard
_11.12 Testing
_Learning completion
_Practice problems
Chapter 12: Implementing File Upload Functionality
_12.1 Creating a Project and Installing Dependencies
_12.2 Creating and Testing a File Upload API
__12.2.1 Testing
_12.3 Saving uploaded files to a specific path
__12.3.1 Testing
_12.4 Serving static files
__12.4.1 Testing
_12.5 Uploading with HTML form
_Learning completion
_Practice problems
Chapter 13: Implementing Real-Time Chat Using WebSockets
_13.1 Introduction to WebSockets
__13.1.1 How WebSockets Work
_13.2 Creating an Echo Application: WebSockets
__13.2.1 Installing the ws package
__13.2.2 Building the server side: Creating the server.js file and running the server
__13.2.3 Implementing the client side: Creating a client.html file
__13.2.4 Testing
__13.2.5 Checking future tasks
_13.3 Creating a Simple Chat Application: socket.io
__13.3.1 Creating a socket.io project
Installing the __13.3.2 package
__13.3.3 Setting up main.ts to load html files
__13.3.4 Creating a Gateway for Server-Side Tasks
__13.3.5 Registering the Gateway with the Module
__13.3.6 Modifying index.html for the client
__13.3.7 Testing
_13.4 Creating a Chat Application with Chat Room Functionality
__13.4.1 Using Namespaces
__13.4.2 Adding a nickname
__13.4.3 Creating a Chat Room
__13.4.4 Implementing the notice area and chat room entry
__13.4.5 Implementing chat room conversation
__13.4.6 Testing
_Learning completion
_Practice problems
appendix A TypeScript: From Beginner to Advanced Features
appendix B: 21 Linux Commands You Must Know
Chapter 00 Setting up the development environment
_0.1 Setting up a Windows development environment
__0.1.1 Node.js Installation
Install __0.1.2 Git
__0.1.3 Install Visual Studio Code
_0.2 Setting up a macOS development environment
__0.2.1 Node.js Installation
Install __0.2.2 Git
__0.2.3 Install Visual Studio Code
_0.3 Setting up a Linux development environment
__0.3.1 Node.js Installation
Install __0.3.2 Git
__0.3.3 Install Visual Studio Code
_0.4 Download the example source code
_0.5 Running the downloaded source code with VSCode
_0.6 VSCode Beginner's Guide
Running the __0.6.1 code
Debugging __0.6.2
__0.6.3 VSCode shortcuts
Chapter 1: Useful Knowledge for Backend Developers
_1.1 What Backend Developers Need to Know
_1.2 Backend Developer's Duties
_1.3 Backend Architecture
_1.4 Backend Programming Language
_1.5 database
__1.5.1 RDB
__1.5.2 NoSQL (Not Only SQL)
_1.6 Cloud Services
_1.7 JavaScript Ecosystem
__1.7.1 Package Manager
__1.7.2 Build Tools
__1.7.3 Development Tools
__1.7.4 Web Framework
__1.7.5 Backend Development Environment
__1.7.6 Infrastructure
_Learning completion
_Practice problems
[Level 2: Getting Started with Backend with Node.js and Express]
Chapter 2: Getting Started with Backend with Node.js
_2.1 Introduction to Node.js
_2.2 How does Node.js execute JavaScript on the server?
__2.2.1 Components of Node.js
__2.2.2 V8 engine for JavaScript execution
__2.2.3 Event loop and operating system asynchronous API and
libuv with thread pool support
__2.2.4 Node.js Architecture
_2.3 Technical Features of Node.js
__2.3.1 Single thread
__2.3.2 Event-driven architecture
__2.3.3 Event Loop
_2.4 Is Node.js worth using?
_2.5 My first Node.js server program
__2.5.1 Create and run the hello.js file
__2.5.2 Download and test curl
_2.6 Performance testing to see if requests are truly processed concurrently
__2.6.1 K6 Installation
__2.6.2 Writing Performance Test Scripts with K6
_Learning completion
_Practice problems
Chapter 3: Implementing a Web Application Server with Node.js and Express
_3.1 Creating a server that returns OK
_3.2 Creating a Router
_3.3 Refactoring createServer( )
_3.4 Responding Dynamically
_3.5 Refactoring the Router
_3.6 Using the Express Framework
__3.6.1 Installing Express
__3.6.2 Creating My First Express Server
__3.6.3 Implementing a server made with Node.js libraries using Express
_3.7 Creating a Simple API Server with Express
__3.7.1 Writing Bulletin Board API Code
__3.7.2 Implementing a server that complies with API rules
_3.8 Testing the Bulletin Board API
__3.8.1 Calling GET with curl
__3.8.2 Posting a post by calling POST with curl
__3.8.3 Deleting a post by calling DELETE with curl
_Learning completion
_Practice problems
Chapter 4: Managing Packages with npm and yarn
_4.1 Introducing npm
_4.2 Packages and Modules
_4.3 Create a package.json file
_4.4 Installing, updating, and removing packages
Installing the __4.4.1 package
__4.4.2 Update the package
__4.4.3 Checking installed packages
__4.4.4 Deleting the package
_4.5 Script Functions and NPX
__4.5.1 Defining an npm script file
__4.5.2 Running the prettier code formatting command with NPX
_4.6 Package Locking
_4.7 yarn alternative to npm
_Learning completion
_Practice problems
Chapter 5: Asynchronous Processing in JavaScript
_5.1 Introduction to JavaScript Asynchronous
_5.2 Introducing callback functions
_5.3 Promise Object
__5.3.1 Calling multiple Promise objects simultaneously
__5.3.2 Handling Promise Exceptions
__5.3.3 Problems with Promises
_5.4 async await syntax
_Learning completion
_Practice problems
Chapter 6: Using MongoDB, a NoSQL Database
_6.1 Introduction to MongoDB
__6.1.1 Database Basic Terminology
__6.1.2 MongoDB Features
_6.2 Setting up MongoDB Atlas
_6.3 Creating a MongoDB CRUD API
_6.4 Checking Data with MongoDB Compass
_6.5 Creating CRUD using Mongoose
__6.5.1 Installing Mongoose
__6.5.2 Creating a schema with Mongoose
__6.5.3 Creating a CRUD API with Mongoose and Express
_6.6 Testing the API with a REST Client
_Learning completion
_Practice problems
Chapter 7: Creating a Paginated Bulletin Board
_7.1 Introduction to Project Structure
_7.2 Bulletin Board Project Setup
__7.2.1 Initial setup of Node.js project
__7.2.2 Installing Express and Setting Up the Project Directory Structure
__7.2.3 Installing and Configuring the Handlebars Template Engine
_7.3 Screen Planning
__7.3.1 List screen planning
__7.3.2 Writing Screen Planning
__7.3.3 Detailed screen planning
_7.4 Creating UI Screens
__7.4.1 Creating a list UI
__7.4.2 Creating a Writing UI
__7.4.3 Creating a Detail Page UI
_7.5 Creating an API
__7.5.1 Creating a Utility for Connecting to MongoDB
__7.5.2 Creating a Handlebars Custom Helper for Use in UI Pages
__7.5.3 Setting up nodemon
__7.5.4 Creating a Writing API
__7.5.5 Creating a List API
__7.5.6 Creating a Detail Page API
__7.5.7 Post Edit API
__7.5.8 Delete Post API
__7.5.9 Add Comment API
__7.5.10 Comment Deletion API
_Learning completion
_Practice problems
Jumping to the Level 3 NestJS Framework
Chapter 8: Getting Started with NestJS
_8.1 Why do we need NestJS?
_8.2 Introduction to NestJS
__8.2.1 Comparing Express and NestJS
__8.2.2 NestJS Overview
_8.3 Installing and Running NestJS
__8.3.1 Installing Dependency Packages
__8.3.2 Setting up TypeScript
__8.3.3 Creating NestJS modules and controllers
__8.3.4 Running the hello-nest app
__8.3.5 NestJS Naming Conventions
_8.4 Creating a Web API with NestJS
__8.4.1 Project Creation and Configuration
__8.4.2 Creating a Controller
__8.4.3 Writing a Blog API
__8.4.4 Creating an API that stores data in memory
__Upgrading the API to store information in 8.4.5 files
_8.5 Dependency Injection
_8.6 Connecting to MongoDB
__8.6.1 Installing dependencies
__8.6.2 Creating a schema
__8.6.3 Adding a repository using MongoDB
__8.6.4 Service Code Change
__8.6.5 Adding MongoDB settings and provider settings to the module
_Learning completion
_Practice problems
Chapter 9: Setting NestJS Environment Variables
_9.1 Introduction to Environment Variables
_9.2 Creating and Setting Up a Project
_9.3 Setting up and testing NestJS
__9.3.1 Setting ConfigModule in app.module.ts
__9.3.2 Creating a .env file
__9.3.3 Add code to app.controller.ts
__9.3.4 Testing
_9.4 Setting ConfigModule as a global module
__9.4.1 Setting environment variables in .env
__9.4.2 Creating a weather module
__9.4.3 Testing with a handler function for testing the weather API
_9.5 Using Multiple Environment Variable Files
__9.5.1 Modify the script to start the server according to the environment
__9.5.2 Create local, dev, and prod environment variables
__9.5.3 Modify the settings to use different environment variable files depending on the environment variable
__9.5.4 Testing with a test handler function
_9.6 Using a custom configuration file
__9.6.1 Creating an environment variable file
__9.6.2 Adding load options to ConfigModule
__9.6.3 Testing reading custom environment variables
_9.7 Learn the order of server startup and configuration file initialization
_9.8 Setting environment variables using a YAML file
__9.8.1 Installing js-yaml
__9.8.2 Creating a config.yaml file
__9.8.3 Modify config.ts
__9.8.4 Testing with a test handler function
_9.9 Using the cache option
_9.10 Using extended variables
__9.10.1 Additional settings to enable use of extended variables
__9.10.2 Testing with a test handler function
_9.11 Using environment variables in main.ts
_Learning completion
_Practice problems
Chapter 10: Signing Up and Verifying Membership
_10.1 Setting up a practice project
__10.1.1 Creating a project with nest-cli
__10.1.2 Creating a User Module
__10.1.3 Setting up a SQLite database
_10.2 Creating entities, services, and controllers for the user module
__10.2.1 Creating an Entity
__10.2.2 Creating a Controller
__10.2.3 Creating a Service
Testing __10.2.4
_10.3 Validating with Pipes
__10.3.1 Setting up a global ValidationPipe
__10.3.2 Creating UserDto
__10.3.3 Testing
_10.4 Creating an Authentication Module and Signing Up
__10.4.1 Creating and Configuring an Authentication Module
__10.4.2 Creating a member registration method
__10.4.3 Checking tables with the sqlite extension
_10.5 Implementing Authentication Using Cookies
__10.5.1 Creating Email and Password Verification Logic in AuthService
__10.5.2 Checking if authenticated using guard
_10.6 Implementing Authentication Using Passport and Session
__10.6.1 Library Installation and Configuration
__10.6.2 Implementing a guard for login and authentication
__10.6.3 Implementing a session serializer that stores and reads information in a session
__10.6.4 Creating a LocalStrategy file with email and password authentication logic
__10.6.5 Add settings to auth.module.ts
Testing __10.6.6
__10.6.7 Sequence of login and session storage
_Learning completion
_Practice problems
Chapter 11: Authenticating Google Login Using OAuth
_11.1 Introduction to OAuth
__11.1.1 OAuth Protocol Flow
__11.1.2 Flow for reissuing access tokens
_11.2 Preparing to Use Google OAuth
__11.2.1 Creating a Project in Google Cloud
__11.2.2 Creating an OAuth consent screen
__11.2.3 Creating an OAuth client ID and password
_11.3 Google OAuth Implementation Sequence
_11.4 Adding a NestJS configuration file
_11.5 Creating a Google OAuth Strategy
_11.6 Creating GoogleAuthGuard
_11.7 Adding a handler method to the controller
__11.7.1 Testing
_11.8 Modifying the User Entity File
_11.9 Adding Google user search and storage methods to UserService
_11.10 Applying a method to save Google users to GoogleStrategy
_11.11 Change to use sessions in GoogleAuthGuard
_11.12 Testing
_Learning completion
_Practice problems
Chapter 12: Implementing File Upload Functionality
_12.1 Creating a Project and Installing Dependencies
_12.2 Creating and Testing a File Upload API
__12.2.1 Testing
_12.3 Saving uploaded files to a specific path
__12.3.1 Testing
_12.4 Serving static files
__12.4.1 Testing
_12.5 Uploading with HTML form
_Learning completion
_Practice problems
Chapter 13: Implementing Real-Time Chat Using WebSockets
_13.1 Introduction to WebSockets
__13.1.1 How WebSockets Work
_13.2 Creating an Echo Application: WebSockets
__13.2.1 Installing the ws package
__13.2.2 Building the server side: Creating the server.js file and running the server
__13.2.3 Implementing the client side: Creating a client.html file
__13.2.4 Testing
__13.2.5 Checking future tasks
_13.3 Creating a Simple Chat Application: socket.io
__13.3.1 Creating a socket.io project
Installing the __13.3.2 package
__13.3.3 Setting up main.ts to load html files
__13.3.4 Creating a Gateway for Server-Side Tasks
__13.3.5 Registering the Gateway with the Module
__13.3.6 Modifying index.html for the client
__13.3.7 Testing
_13.4 Creating a Chat Application with Chat Room Functionality
__13.4.1 Using Namespaces
__13.4.2 Adding a nickname
__13.4.3 Creating a Chat Room
__13.4.4 Implementing the notice area and chat room entry
__13.4.5 Implementing chat room conversation
__13.4.6 Testing
_Learning completion
_Practice problems
appendix A TypeScript: From Beginner to Advanced Features
appendix B: 21 Linux Commands You Must Know
Detailed image
.jpg)
Publisher's Review
Welcome to the backend world
Introducing the next book on HTML/CSS/JavaScript
welcome.
If you want to become a backend developer but don't know how or what to do, you've come to the right place.
This book teaches you what beginners to JavaScript-based backends need to know after studying HTML/CSS/JavaScript.
To grow as a developer in any field, you need to know a lot.
You shouldn't just learn what's easy.
Even if it's a little difficult, you need to learn in depth, focusing on techniques used in real life, to build your skills.
So, this book is packed with useful content, focusing on Node.js, not only for beginners but also for working developers who want to brush up on the basics.
Knowing TypeScript will help you learn.
TypeScript syntax is explained in the appendix.
JavaScript Backend: Start with the Three Masters
For the JavaScript backend, start with the three major topics: “programming language,” “runtime,” and “web framework.”
The core of the JavaScript backend environment is Node.js.
To take full advantage of Node.js, you need TypeScript, which provides object-oriented programming techniques.
Until now, Node.js has used Express as its server framework, but recently there has been a trend towards adopting NestJS.
However, in the real world, you need to be able to handle both of these tools, so this book covers both Express and NestJS.
So, shall we take a closer look at the three generals?
TypeScript is a programming language that adds static type syntax based on JavaScript.
It's widely used in large-scale projects and is a mandatory choice for teamwork in most companies these days. It offers a new syntax based on ES6 and is fully compatible with JavaScript.
Although it is a relatively new language, it has a strong ecosystem thanks to Microsoft support (see Appendix A).
〈Node.js〉 is a JavaScript runtime that can execute JavaScript on the server side.
Node.js is a great choice for developers in demanding and fast-changing environments.
You can also use the same code as the frontend, and Node.js has a very rich developer ecosystem, which has the advantage of reducing development time and increasing the stability of the system.
Express is the most used web framework for Node.js.
It aims to be a minimalist framework and has an easily extensible structure, so there are many extension libraries.
〈NestJS〉 is a web framework that helps you create productive web applications quickly and reliably by applying the latest JavaScript technologies.
The Become a Developer series will show you the way forward.
Check out our backend roadmap for beginners.
The author recalled the difficulties he faced when he first started out as a backend developer.
I didn't know what to do or how to do it.
We needed a roadmap.
But no one provided a proper roadmap.
So, the author first presents and explains the backend roadmap that beginners need.
The roadmap lists numerous technologies.
You can't fit everything on the roadmap into one book, nor can you learn it all in one go.
This book provides basic knowledge that can be used as a starting point, focusing on JavaScript Node.js.
Learn practical skills
Technology changes rapidly.
There are technologies that are trending now but are losing ground, and technologies that are still weak but are rising.
There are good reasons why trends change.
On the other hand, the fundamentals do not change regardless of trends.
So, the basics are solid, and the skill set is trendy and practical.
Experience high-quality code with a wealth of experience.
If you search the Internet, you can easily get working code.
Most of the code obtained in this way lacks functionality or causes various issues as the service grows.
The code in this book is not that kind of copy-and-paste code from the Internet.
This code is a result of our experience developing and operating large-scale services.
For example, there are many bulletin board codes, but there is no code on the Internet that properly provides the functions that are actually needed in practice.
In this book, you'll discover a bulletin board with fully functional search, commenting, pagination, file upload, and social login features.
Clearly indicate which code has been changed or modified.
Just as in the real world, in this book we will be continuously revising and completing the code, so you need to be able to tell where you have modified or deleted existing code.
To make it easier to find, I've marked the code with changes with a delete line and a yellow background.
Introducing the topics covered in this book
To avoid interrupting the learning flow, this book builds a development environment in advance, and then builds JavaScript backend development skills, dividing it into levels 1 through 3, focusing on Node.js.
Each chapter includes practice problems, Appendix A covers TypeScript from beginner to advanced features, and Appendix B covers 21 essential Linux commands.
_Level 1 Introduction to Backend Developer
After setting up the development environment in Chapter 0, Chapter 1 guides you through what a backend developer needs to know and do.
Because I'm going to teach you a broad and shallow knowledge that will be helpful to know, you'll encounter a lot of unfamiliar words.
You don't have to try to understand everything at once.
Read it once the first time, then read it again after you've read the rest of the book.
Then, you will be able to properly understand the ultimate goal of 'becoming a backend developer'.
_Level 2 Getting Started with Backend with Node.js and Express
The ultimate goal is to acquire the ability to create a bulletin board with Express.
Creating a bulletin board that addresses, reflects, and modifies user requests will help you learn a variety of practical skills.
Chapter 2 covers how Node.js works, Chapter 3 covers creating a web server with Express, Chapter 4 covers how to use npm, Chapter 5 covers asynchronous processing in JavaScript, and Chapter 6 covers MongoDB.
In Chapter 7, we will create a bulletin board with search, comment editing, and pagination.
_Jump to the Level 3 NestJS Framework
Let's learn how to develop using NestJS.
Chapter 8 covers NestJS, Chapter 9 covers setting up NestJS environment variables, Chapter 10 covers member registration and login, Chapter 11 covers Google login authentication using OAuth, and Chapter 12 covers implementing a file upload feature.
Finally, in Chapter 13, we implement real-time chat using WebSockets.
Here's an example we'll create together.
Creating a bulletin board with comment editing and pagination using _express (Chapter 7)
Bulletin boards are a common example when creating web frameworks.
But there are more things to consider than you might think when creating a proper bulletin board.
Providing search, paging, and handling comment areas on detail pages is quite challenging.
It wouldn't be entirely wrong to say that if you can create a good bulletin board, you can create most of the logic needed in the field.
Let's implement a bulletin board with enough functionality to actually be used.
_Implementing Google Login Using Google OAuth (Chapters 10 and 11)
Authentication is implemented using Google's OAuth. OAuth is an open authorization standard created by Google and Twitter in 2006.
Naver, Google, KakaoTalk, and others support social login using OAuth. Using OAuth is relatively secure because it retrieves user authentication information from an external source.
It is convenient for users because they do not have to register as members every time and do not have to memorize IDs and passwords.
_Implementing File Upload (Chapter 12)
Implement file upload functionality.
Not only text, but also formats such as video and images are widely used in applications.
To use these different formats in your application, you need a file upload feature.
_Implementing Real-Time Chat (Chapter 13)
Implement real-time chat.
WebSockets allow servers to respond without a client request.
In Chapter 13, we'll learn what WebSockets are and get a feel for real-time updating applications by building echo and chat applications.
Introduction to the Becoming series
The "Becoming" series, as the name suggests, is a book prepared for those who want to grow in the IT field.
We present carefully selected IT technologies along with a roadmap and guide you through practical study.
We will support you to quickly grow into a practitioner in your field.
Introducing the next book on HTML/CSS/JavaScript
welcome.
If you want to become a backend developer but don't know how or what to do, you've come to the right place.
This book teaches you what beginners to JavaScript-based backends need to know after studying HTML/CSS/JavaScript.
To grow as a developer in any field, you need to know a lot.
You shouldn't just learn what's easy.
Even if it's a little difficult, you need to learn in depth, focusing on techniques used in real life, to build your skills.
So, this book is packed with useful content, focusing on Node.js, not only for beginners but also for working developers who want to brush up on the basics.
Knowing TypeScript will help you learn.
TypeScript syntax is explained in the appendix.
JavaScript Backend: Start with the Three Masters
For the JavaScript backend, start with the three major topics: “programming language,” “runtime,” and “web framework.”
The core of the JavaScript backend environment is Node.js.
To take full advantage of Node.js, you need TypeScript, which provides object-oriented programming techniques.
Until now, Node.js has used Express as its server framework, but recently there has been a trend towards adopting NestJS.
However, in the real world, you need to be able to handle both of these tools, so this book covers both Express and NestJS.
So, shall we take a closer look at the three generals?
TypeScript is a programming language that adds static type syntax based on JavaScript.
It's widely used in large-scale projects and is a mandatory choice for teamwork in most companies these days. It offers a new syntax based on ES6 and is fully compatible with JavaScript.
Although it is a relatively new language, it has a strong ecosystem thanks to Microsoft support (see Appendix A).
〈Node.js〉 is a JavaScript runtime that can execute JavaScript on the server side.
Node.js is a great choice for developers in demanding and fast-changing environments.
You can also use the same code as the frontend, and Node.js has a very rich developer ecosystem, which has the advantage of reducing development time and increasing the stability of the system.
Express is the most used web framework for Node.js.
It aims to be a minimalist framework and has an easily extensible structure, so there are many extension libraries.
〈NestJS〉 is a web framework that helps you create productive web applications quickly and reliably by applying the latest JavaScript technologies.
The Become a Developer series will show you the way forward.
Check out our backend roadmap for beginners.
The author recalled the difficulties he faced when he first started out as a backend developer.
I didn't know what to do or how to do it.
We needed a roadmap.
But no one provided a proper roadmap.
So, the author first presents and explains the backend roadmap that beginners need.
The roadmap lists numerous technologies.
You can't fit everything on the roadmap into one book, nor can you learn it all in one go.
This book provides basic knowledge that can be used as a starting point, focusing on JavaScript Node.js.
Learn practical skills
Technology changes rapidly.
There are technologies that are trending now but are losing ground, and technologies that are still weak but are rising.
There are good reasons why trends change.
On the other hand, the fundamentals do not change regardless of trends.
So, the basics are solid, and the skill set is trendy and practical.
Experience high-quality code with a wealth of experience.
If you search the Internet, you can easily get working code.
Most of the code obtained in this way lacks functionality or causes various issues as the service grows.
The code in this book is not that kind of copy-and-paste code from the Internet.
This code is a result of our experience developing and operating large-scale services.
For example, there are many bulletin board codes, but there is no code on the Internet that properly provides the functions that are actually needed in practice.
In this book, you'll discover a bulletin board with fully functional search, commenting, pagination, file upload, and social login features.
Clearly indicate which code has been changed or modified.
Just as in the real world, in this book we will be continuously revising and completing the code, so you need to be able to tell where you have modified or deleted existing code.
To make it easier to find, I've marked the code with changes with a delete line and a yellow background.
Introducing the topics covered in this book
To avoid interrupting the learning flow, this book builds a development environment in advance, and then builds JavaScript backend development skills, dividing it into levels 1 through 3, focusing on Node.js.
Each chapter includes practice problems, Appendix A covers TypeScript from beginner to advanced features, and Appendix B covers 21 essential Linux commands.
_Level 1 Introduction to Backend Developer
After setting up the development environment in Chapter 0, Chapter 1 guides you through what a backend developer needs to know and do.
Because I'm going to teach you a broad and shallow knowledge that will be helpful to know, you'll encounter a lot of unfamiliar words.
You don't have to try to understand everything at once.
Read it once the first time, then read it again after you've read the rest of the book.
Then, you will be able to properly understand the ultimate goal of 'becoming a backend developer'.
_Level 2 Getting Started with Backend with Node.js and Express
The ultimate goal is to acquire the ability to create a bulletin board with Express.
Creating a bulletin board that addresses, reflects, and modifies user requests will help you learn a variety of practical skills.
Chapter 2 covers how Node.js works, Chapter 3 covers creating a web server with Express, Chapter 4 covers how to use npm, Chapter 5 covers asynchronous processing in JavaScript, and Chapter 6 covers MongoDB.
In Chapter 7, we will create a bulletin board with search, comment editing, and pagination.
_Jump to the Level 3 NestJS Framework
Let's learn how to develop using NestJS.
Chapter 8 covers NestJS, Chapter 9 covers setting up NestJS environment variables, Chapter 10 covers member registration and login, Chapter 11 covers Google login authentication using OAuth, and Chapter 12 covers implementing a file upload feature.
Finally, in Chapter 13, we implement real-time chat using WebSockets.
Here's an example we'll create together.
Creating a bulletin board with comment editing and pagination using _express (Chapter 7)
Bulletin boards are a common example when creating web frameworks.
But there are more things to consider than you might think when creating a proper bulletin board.
Providing search, paging, and handling comment areas on detail pages is quite challenging.
It wouldn't be entirely wrong to say that if you can create a good bulletin board, you can create most of the logic needed in the field.
Let's implement a bulletin board with enough functionality to actually be used.
_Implementing Google Login Using Google OAuth (Chapters 10 and 11)
Authentication is implemented using Google's OAuth. OAuth is an open authorization standard created by Google and Twitter in 2006.
Naver, Google, KakaoTalk, and others support social login using OAuth. Using OAuth is relatively secure because it retrieves user authentication information from an external source.
It is convenient for users because they do not have to register as members every time and do not have to memorize IDs and passwords.
_Implementing File Upload (Chapter 12)
Implement file upload functionality.
Not only text, but also formats such as video and images are widely used in applications.
To use these different formats in your application, you need a file upload feature.
_Implementing Real-Time Chat (Chapter 13)
Implement real-time chat.
WebSockets allow servers to respond without a client request.
In Chapter 13, we'll learn what WebSockets are and get a feel for real-time updating applications by building echo and chat applications.
Introduction to the Becoming series
The "Becoming" series, as the name suggests, is a book prepared for those who want to grow in the IT field.
We present carefully selected IT technologies along with a roadmap and guide you through practical study.
We will support you to quickly grow into a practitioner in your field.
GOODS SPECIFICS
- Date of issue: April 15, 2023
- Page count, weight, size: 580 pages | 1,012g | 183*235*28mm
- ISBN13: 9791191905274
You may also like
카테고리
korean


korean

![GQ KOREA Mark (Monthly): December [2025]](http://librairie.coreenne.fr/cdn/shop/files/8ef265dbbfbf186523ed75ba7319009d.jpg?v=1765340328&width=3840)


