

Let's create an anime-style character with Blender! : Modeling Edition
 |
Description
Book Introduction
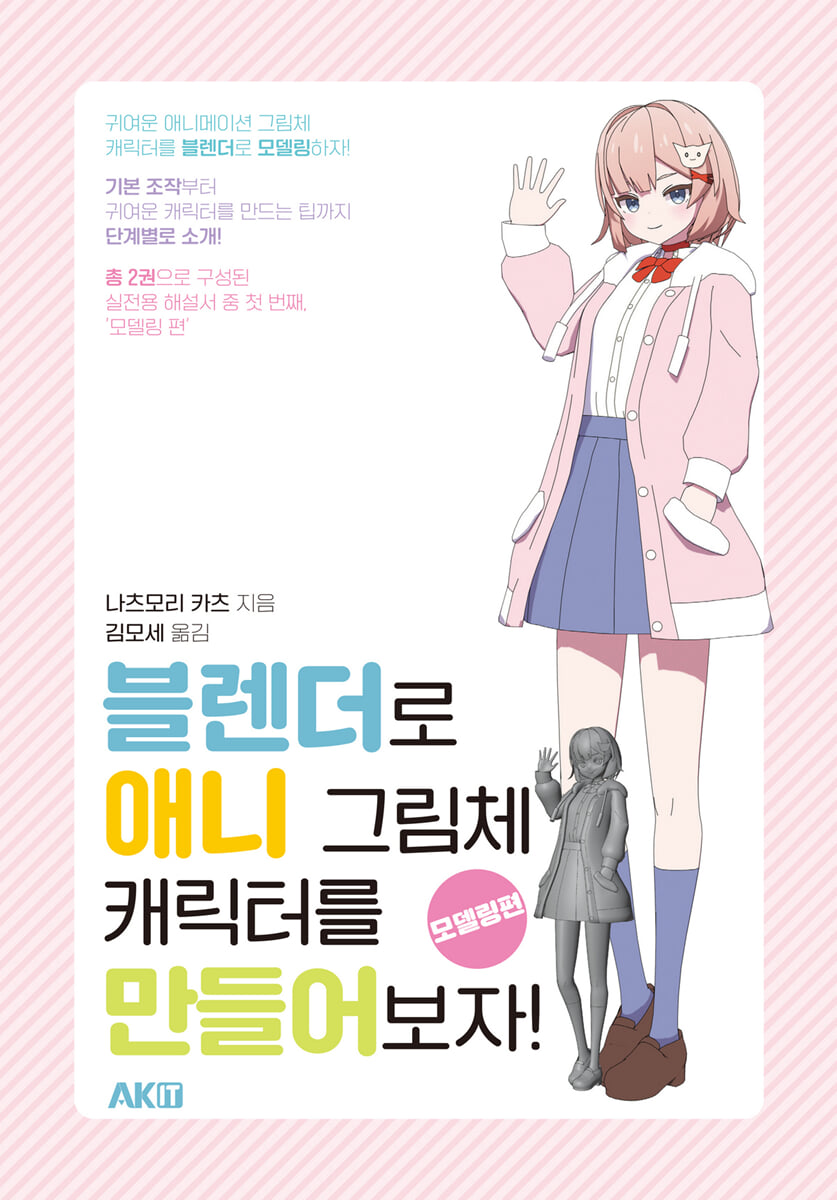
Let's model cute anime-style characters with Blender! Step-by-step instructions, from basic controls to cute character creation tips! We'll even show you how to create anime-style 3D CG and virtual YouTuber characters! The first of two practical guides, "Modeling," is here!
- You can preview some of the book's contents.
Preview
index
Chapter 1 Part 1: Basics: Learn the basics of Blender
1. Blender Installation and Configuration
-1-1 Usage environment
-1-2 Blender download order
-1-3 Blender installation sequence
-1-4 Blender Preferences
2 How to manipulate and close Blender files
-2-1 Save file
-2-2 Save related warning screen
-2-3 Open file
3 Blender Screen Description
-3-1 Name of each area
-3-2 3D viewport
-3-3 Outliner
-3-4 properties
-3-5 Top Bar Description
4 Basic Operations
-4-1 Basic operation at point
-4-2 Point of view control using the number pad
-4-3 Change viewpoint through navigator
-4-4 About the selection
5 Move, rotate, accumulate
-5-1 Basic Operations
-5-2 Delete, add, and duplicate objects
6 Mode switching and screen customization
-6-1 Mode Switching
-6-2 Area boundary movement
-6-3 Area division/integration
-6-4 Split/merge using area corners
-6-5 Editor Type
-6-6 Area Restore
-6-7 Chapter 1 Summary
Chapter 2 Part 1: Let's create a simple cat character.
1 Let's start modeling
-1-1 Cat character to be modeled
2 Let's lay out the outline
-2-1 Description of the sketch
-2-2 Preparing the sketch layout
-2-3 3D Cursor
-2-4 Front and right underdrawing placement
-2-5 Fix and save the sketch
3 Let's do modeling
-3-1 Tips for getting familiar with modeling
-3-2 Cat Face Modeling
-3-3 Using the modifier
-3-4 Toggle wireframe and X-Ray
-3-5 Let's adjust the size
-3-6 Move in proportional editing
-3-7 Let's model cat ears
-3-8 Let's model the eyes
-3-9 Let's model the mouth
-3-10 Chapter 2 Summary
Chapter 3 Part 2: Let's make the character's head
1. Sequence description and modeling flow
-1-1 Character to be modeled
-1-2 About the sketch
-1-3 Work order
2. Preparing for modeling
-2-1 Base layout
-2-2 Changing the layout and size of the sketch
-2-3 Fix the base drawing and change the name
3 Head Modeling
-3-1 About a face that gives a cute feeling
-Modeling using the 3-2 face
-3-3 Modeling around the eyes
-3-4 Modeling around the mouth
-3-5 Modeling the inside of the eyes and mouth
-3-6 Back of the head modeling
-3-7 Modeling around the neck
-3-8 Face detail modification
-3-9 Ear Modeling
-3-10 Tips for modeling oblique faces, adding subdivision surfaces
-3-11 Eyelash, eyebrow, and double eyelid modeling
-3-12 Pupil Modeling
4 Tongue and Teeth Modeling
-4-1 Tongue Modeling
-4-2 This modeling
5 Face Finish
-5-1 Smooth application
-5-2 Sharp application
6 Hair Modeling
-6-1 Hair is broadly divided into four areas.
-6-2 Forehead Modeling
-6-3 Side hair modeling
-6-4 Back of head modeling
-6-5 Hair finishing
Chapter 4 Part 2: Let's create the character's body!
1. Basic knowledge about human body modeling
-1-1 Points to consider when modeling the human body
2 Upper body modeling
-2-1 Circle, Place UV Sphere
-2-2 Upper body modeling
3 Lower body modeling and overall body adjustment
-3-1 Modeling from the waist to the lower body
-3-2 Overall adjustment
4 Arm and Hand Modeling
-4-1 Arm Modeling
-4-2 Hand Modeling
5 Leg/Foot Modeling
-5-1 Bridge Modeling
-5-2 foot modeling
6 Overall adjustment
-6-1 Head position adjustment
-6-2 Waist area modification
-Apply 6-3 loop cut
-6-4 ship part line correction
Chapter 5 Part 2: Let's Make Character Clothes
1 Shirt Modeling
-1-1 Shirt body modeling
-1-2 Modeling the collar
-1-3 Retail Part Modeling
2 Skirt Modeling
3 Parka Modeling
-3-1 Parka body modeling
-3-2 Hood part modeling
-3-3 Arm part modeling
-3-4 Lower body modeling
-3-5 Placket Front Part Modeling
4. Modeling shoes and props
-4-1 Oral Modeling
-4-2 Prop Modeling
5 Finishing and Line Art
-5-1 Body and face combination
-5-2 Line Art Settings
1. Blender Installation and Configuration
-1-1 Usage environment
-1-2 Blender download order
-1-3 Blender installation sequence
-1-4 Blender Preferences
2 How to manipulate and close Blender files
-2-1 Save file
-2-2 Save related warning screen
-2-3 Open file
3 Blender Screen Description
-3-1 Name of each area
-3-2 3D viewport
-3-3 Outliner
-3-4 properties
-3-5 Top Bar Description
4 Basic Operations
-4-1 Basic operation at point
-4-2 Point of view control using the number pad
-4-3 Change viewpoint through navigator
-4-4 About the selection
5 Move, rotate, accumulate
-5-1 Basic Operations
-5-2 Delete, add, and duplicate objects
6 Mode switching and screen customization
-6-1 Mode Switching
-6-2 Area boundary movement
-6-3 Area division/integration
-6-4 Split/merge using area corners
-6-5 Editor Type
-6-6 Area Restore
-6-7 Chapter 1 Summary
Chapter 2 Part 1: Let's create a simple cat character.
1 Let's start modeling
-1-1 Cat character to be modeled
2 Let's lay out the outline
-2-1 Description of the sketch
-2-2 Preparing the sketch layout
-2-3 3D Cursor
-2-4 Front and right underdrawing placement
-2-5 Fix and save the sketch
3 Let's do modeling
-3-1 Tips for getting familiar with modeling
-3-2 Cat Face Modeling
-3-3 Using the modifier
-3-4 Toggle wireframe and X-Ray
-3-5 Let's adjust the size
-3-6 Move in proportional editing
-3-7 Let's model cat ears
-3-8 Let's model the eyes
-3-9 Let's model the mouth
-3-10 Chapter 2 Summary
Chapter 3 Part 2: Let's make the character's head
1. Sequence description and modeling flow
-1-1 Character to be modeled
-1-2 About the sketch
-1-3 Work order
2. Preparing for modeling
-2-1 Base layout
-2-2 Changing the layout and size of the sketch
-2-3 Fix the base drawing and change the name
3 Head Modeling
-3-1 About a face that gives a cute feeling
-Modeling using the 3-2 face
-3-3 Modeling around the eyes
-3-4 Modeling around the mouth
-3-5 Modeling the inside of the eyes and mouth
-3-6 Back of the head modeling
-3-7 Modeling around the neck
-3-8 Face detail modification
-3-9 Ear Modeling
-3-10 Tips for modeling oblique faces, adding subdivision surfaces
-3-11 Eyelash, eyebrow, and double eyelid modeling
-3-12 Pupil Modeling
4 Tongue and Teeth Modeling
-4-1 Tongue Modeling
-4-2 This modeling
5 Face Finish
-5-1 Smooth application
-5-2 Sharp application
6 Hair Modeling
-6-1 Hair is broadly divided into four areas.
-6-2 Forehead Modeling
-6-3 Side hair modeling
-6-4 Back of head modeling
-6-5 Hair finishing
Chapter 4 Part 2: Let's create the character's body!
1. Basic knowledge about human body modeling
-1-1 Points to consider when modeling the human body
2 Upper body modeling
-2-1 Circle, Place UV Sphere
-2-2 Upper body modeling
3 Lower body modeling and overall body adjustment
-3-1 Modeling from the waist to the lower body
-3-2 Overall adjustment
4 Arm and Hand Modeling
-4-1 Arm Modeling
-4-2 Hand Modeling
5 Leg/Foot Modeling
-5-1 Bridge Modeling
-5-2 foot modeling
6 Overall adjustment
-6-1 Head position adjustment
-6-2 Waist area modification
-Apply 6-3 loop cut
-6-4 ship part line correction
Chapter 5 Part 2: Let's Make Character Clothes
1 Shirt Modeling
-1-1 Shirt body modeling
-1-2 Modeling the collar
-1-3 Retail Part Modeling
2 Skirt Modeling
3 Parka Modeling
-3-1 Parka body modeling
-3-2 Hood part modeling
-3-3 Arm part modeling
-3-4 Lower body modeling
-3-5 Placket Front Part Modeling
4. Modeling shoes and props
-4-1 Oral Modeling
-4-2 Prop Modeling
5 Finishing and Line Art
-5-1 Body and face combination
-5-2 Line Art Settings
Detailed image

Publisher's Review
Recently, a production method called 'cartoon rendering', which expresses 3D CG in a drawing style similar to that of an animated character, is gaining attention.
It is a method of creating 3D CG animation that feels like a hand-drawn animation by intentionally reducing the amount of information contained in the shape by adding outlines to the model or reducing the number of cuts when creating the animation.
There are increasing ways to create models and movements in Blender, similar to hand-drawn animation, and the demand for cartoon rendering will continue to grow in the future.
This series, consisting of a first and second part, was created for those who are interested in 'character modeling' using 'Blender' and want to start creating 3D CG animation drawings.
This book is the first of its kind and covers everything from 'Blender Basic Operations' to 'Character Modeling'.
To ensure that even beginners can learn practical modeling with just this book, we've divided it into two parts to explain in as much detail as possible. We also provide columns on modeling, sample files, and points where beginners tend to make mistakes, so feel free to follow along and create characters step by step!
It is a method of creating 3D CG animation that feels like a hand-drawn animation by intentionally reducing the amount of information contained in the shape by adding outlines to the model or reducing the number of cuts when creating the animation.
There are increasing ways to create models and movements in Blender, similar to hand-drawn animation, and the demand for cartoon rendering will continue to grow in the future.
This series, consisting of a first and second part, was created for those who are interested in 'character modeling' using 'Blender' and want to start creating 3D CG animation drawings.
This book is the first of its kind and covers everything from 'Blender Basic Operations' to 'Character Modeling'.
To ensure that even beginners can learn practical modeling with just this book, we've divided it into two parts to explain in as much detail as possible. We also provide columns on modeling, sample files, and points where beginners tend to make mistakes, so feel free to follow along and create characters step by step!
GOODS SPECIFICS
- Date of issue: August 10, 2024
- Page count, weight, size: 480 pages | 1,214g | 188*257*25mm
- ISBN13: 9791127479275
- ISBN10: 112747927X
You may also like
카테고리
korean


korean

![GQ KOREA Mark (Monthly): December [2025]](http://librairie.coreenne.fr/cdn/shop/files/8ef265dbbfbf186523ed75ba7319009d.jpg?v=1765340328&width=3840)


