

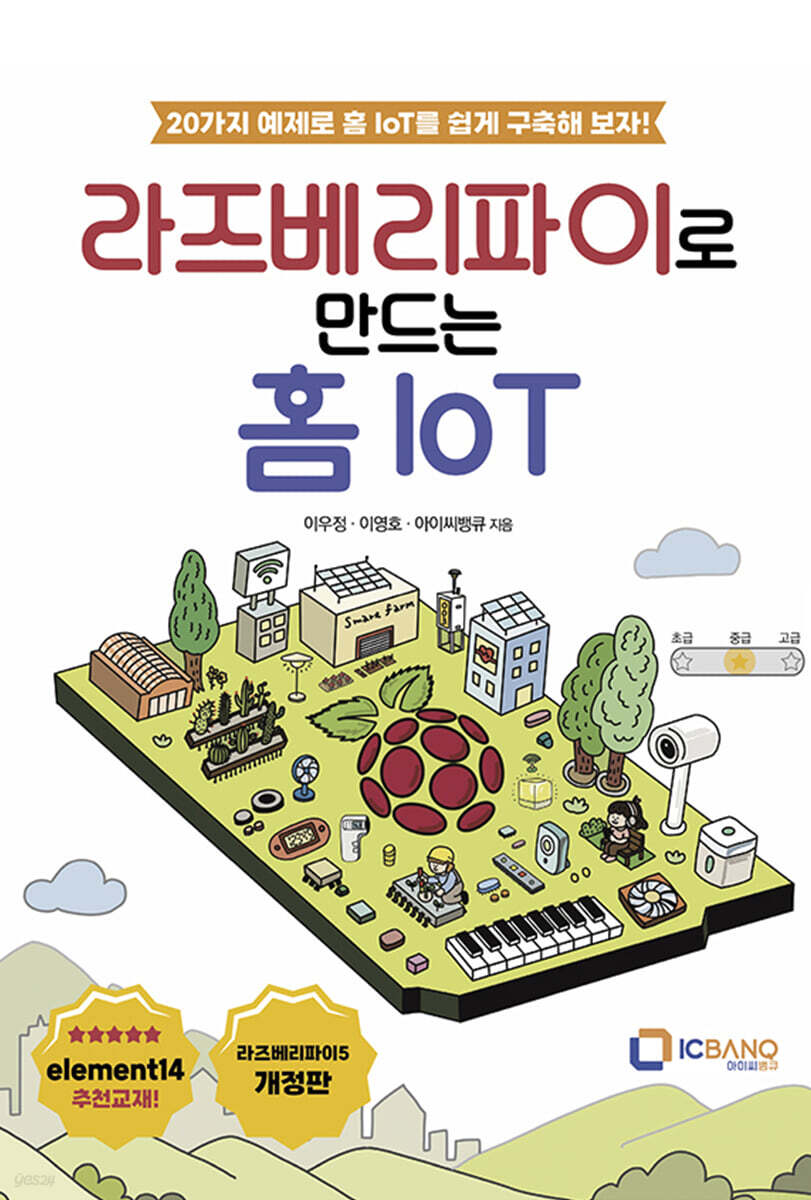
Home IoT with Raspberry Pi
 |
Description
Book Introduction
Easily build home IoT with 20 examples!
My own Raspberry Pi IoT!
Most people who are new to Raspberry Pi think, “It’s too difficult,” “There’s too much to learn before using it,” or “The barrier to entry is high.”
This book was written with the intention of providing a small help to those transitioning from Arduino to Raspberry Pi to make it easier to approach Raspberry Pi.
As you learn to connect the sensors you learned about in Arduino to the GPIO pins in a Raspberry Pi environment, you will gradually become more familiar with the Raspberry Pi.
My own Raspberry Pi IoT!
Most people who are new to Raspberry Pi think, “It’s too difficult,” “There’s too much to learn before using it,” or “The barrier to entry is high.”
This book was written with the intention of providing a small help to those transitioning from Arduino to Raspberry Pi to make it easier to approach Raspberry Pi.
As you learn to connect the sensors you learned about in Arduino to the GPIO pins in a Raspberry Pi environment, you will gradually become more familiar with the Raspberry Pi.
- You can preview some of the book's contents.
Preview
index
Recommendation
Header
Chapter 00 What is a Raspberry Pi Board?
Chapter 01: Getting Started; Raspberry Pi OS Installation and Configuration
1.
Learning Summary
2.
Installing Raspberry Pi OS
2.1 Download Raspberry Pi OS
2.2 MicroSD Card Format
2.3 Installing Raspberry Pi OS (32-bit)
2.4 Installing Raspberry Pi OS (64-bit)
3.
Remotely accessing your Raspberry Pi
3.1 Setting up SSH access (wifi) without connecting peripheral devices (difficulty: intermediate)
3.2 SSH connection via command prompt
3.3 Remotely accessing the Raspberry Pi via VNC
4.
Setting up the Raspberry Pi OS
4.1 Introduction to Raspberry Pi OS Software (Full Version)
4.2 Raspberry Pi OS Configuration
5.
Changing the Raspberry Pi OS Resolution
6.
Setting up the Raspberry Pi OS in Korean
6.1 How to Install Korean on Raspberry Pi OS (Korean Input Method: ibus)
Chapter 02 Learning Linux
1.
Learning Summary
2.
Basic Linux commands
2.1 Using Linux Commands
2.2 Basic Commands
2.3 Other commands
3.
Linux directory structure
4.
Editing document files
4.1 nano
4.2 vi (vim) (Difficulty: Intermediate)
Chapter 03 Python Code Editor
1.
Learning Summary
2.
Thonny Python IDE
2.1 Opening the Thonny Python IDE
2.2 Using the Thonny Python IDE
2.3 Using VIM as a Python IDE (Difficulty: Intermediate)
3. Sending files from your PC to the Raspberry Pi OS
Chapter 04: Basic Python Grammar
1.
Learning Summary
2.
Python language
2.1 Download Python
2.2 Features of the Python Language
3.
Python data types
3.1 Numeric data types
3.2 String data type
3.3 List data type (List)
3.4 Tuple data type
3.5 Dictionary Data Type
3.6 Variable
4.
Conditional statements
4.1 Basic structure of if conditional statement
4.2 Comparison operators in conditional statements
4.3 Logical operators in conditional statements
4.4 Two or more conditional statements
4.5 Nested conditionals
5.
loop
5.1 for loop
5.2 while loop
6.
Input/output
6.1 User Input
6.2 Data output (print)
7.
Modules, packages, and libraries
7.1 Module
7.2 Package
7.3 Library
8.
logging
8.1 Changing logging levels, file output, and encoding settings
8.2 Using Variables
8.3 Formatting
Chapter 05 Using the Basic Raspberry Pi Devices
1.
Learning Summary
2.
Raspberry Pi 5B hardware
3.
Raspberry Pi 4B+ hardware
4.
Raspberry Pi 3B+ hardware
5. GPIO (general purpose input/output)
5.1 GPIO Python Code
6.
camera
7. USB microphone
8.
Speakers/Earphones
9.
Display / Monitor
10.
Breadboard
11.
Cobbler (T-Cobbler)
12.
Warning icon
13. RTC (Real Time Clock)
14.
Power button
Chapter 06: Creating a Cooling Fan Speed Control Module
1.
Learning Summary
2.
Assignment Description
3.
Description of supplies and main components
3.1 Transistor
3.2 Diode
3.3 Resistance
3.4 Fan
4.
Circuit diagram
5.
Principle explanation
6.
Fan speed control practice
6.1 Checking the Raspberry Pi System Temperature
6.2 Controlling with Python Code
6.3 Controlling Cooling Fan Operation with Raspberry Pi Configuration Settings
Chapter 07 A stand that automatically turns off the lights in the morning
1.
Learning Summary
2.
Assignment Description
3.
Description of supplies and main components
3.1 Light sensor
3.2 LED
3.3 ADC
3.4 Tact Button
4.
Circuit diagram
5.
Principle explanation
6.
Practice using basic buttons
6.1 Difference between pull-up and pull-down resistors
6.2 Implementing a Toggle Switch
7.
Practice controlling the LED to automatically turn off when it gets brighter
7.1 Setting up SPI
7.2 MCP3008, MCP3208
7.3 Turning the LED On/Off with the light sensor value
Chapter 08 Mood lighting that automatically adjusts brightness when it gets dark
1.
Learning Summary
2.
Assignment Description
3.
Description of supplies and main components
3.1 Light sensor
3.2 LED
3.3 ADC
4.
Circuit diagram
5.
Principle explanation
6. PWM Basic Practice
6.1 LED that gradually brightens and gradually turns off when you press the button
7.
Mood lighting practice that automatically adjusts brightness when it gets dark
7.1 Setting up SPI
7.2 Adjusting LED brightness using light sensor values
Chapter 09 Digital Piano
1.
Learning Summary
2.
Assignment Description
3.
Description of supplies and main components
3.1 4×4 touch keypad
3.2 Buzzer
4.
Circuit diagram
5.
Principle explanation
6.
4×4 Keypad Basics Practice
7.
Digital Piano Making Practice
7.1 Playing a musical scale with a buzzer
7.2 Using the electrostatic touch keypad
7.3 Completing the Digital Keyboard
Chapter 10: A fan that turns on automatically when it gets hot
1.
Learning Summary
2.
Assignment Description
3.
Description of supplies and main components
3.1 Temperature and humidity sensor
3.2 DC motor
3.3 Motor Driver
3.4 Tact Button
4.
Circuit diagram and explanation of the principle
5.
Practice with a fan that turns on automatically when it gets hot
5.1 Using the Temperature and Humidity Sensor
5.2 Using DC Motors
5.3 Complete the fan that turns on automatically when it gets hot.
6.
Button Interrupt (Difficulty: Intermediate)
6.1 GPIO.PUD_UP and GPIO.PUD_DOWN
6.2 Interrupt 1: RPi.GPIO wait_for_edge()
6.3 Interrupt 2: add_event_detect() and callback function
Chapter 11 Smart Outlets
1.
Learning Summary
2.
Assignment Description
3.
Description of supplies and main components
3.1 Relay
4.
Circuit diagram and explanation of the principle
5.
Smart outlet practice
5.1 Enabling Remote GPIO
5.2 Operating an LED connected to a relay with a button
5.3 Operating an LED connected to a relay using remote GPIO
5.4 Operating an LED using Remote GPIO (Application)
Chapter 12: Making a Non-Contact Thermometer
1.
Learning Summary
2.
Assignment Description
3.
Description of supplies and main components
3.1 Non-contact temperature sensor (GY-906)
3.2 4 digital 7 segments (FND × 4)
4.
Circuit diagram and explanation of the principle
5.
7-Segment Basic Usage Practice
5.1 Single-digit FND practice
5.2 Four-digit FND practice
6.
Making a Non-Contact Thermometer
6.1 Enabling I2C Communication
6.2 Outputting FND (TM1637) values
6.3 Reading non-contact thermometer values
6.4 Completing the Non-Contact Thermometer
Chapter 13: Creating a Healthcare Pedometer
1.
Learning Summary
2.
Assignment Description
3.
Description of supplies and main components
3.1 Tilt Sensor (GY-521/MPU6050)
3.2 4 digital 7 segments (FND × 4)
4.
Circuit diagram and explanation of the principle
5.
Pedometer practice using a tilt sensor
5.1 Enabling I2C Communication
5.2 Tilt Sensor Practice
5.3 Practical tutorial on creating a pedometer
Chapter 14: Creating a Smart Farm
1.
Learning Summary
2.
Assignment Description
3.
Description of supplies and main components
3.1 Soil moisture sensor
3.2 Temperature and humidity sensor (DHT11)
3.3 ADC
4.
Circuit diagram
5.
Smart Farm Practice
5.1 Setting up SPI for ADC use
5.2 Installing the Temperature and Humidity Sensor Library
5.3 Completing the Smart Farm Practice
Chapter 15 The fine dust at my house is clear today.
1.
Learning Summary
2.
Assignment Description
3.
Description of supplies and main components
3.1 Fine dust sensor
3.2 USB to TTL Serial Cable
4.
Circuit diagram
5.
Fine dust practice
5.1 Finding the UART Port
5.2 Installing the Fine Dust Sensor Library
5.3 Complete the practice of "The fine dust at my house is clear today"
Chapter 16 Smart Trash Can
1.
Learning Summary
2.
Assignment Description
3.
Description of supplies and main components
3.1 Load cell
3.2 Ultrasonic sensor
3.3 Servo motor
3.4 Logic level shifter
3.5 LED, resistor
4.
Circuit diagram
5.
Basic Sensor Practice
5.1 Load Cell Practice
5.2 Ultrasonic Sensor Practice
5.3 Servo Motor Practice
6.
Smart Trash Can Practice
Chapter 17: Creating Digital Signage
1.
Learning Summary
2.
Assignment Description
3.
Description of supplies and main components
3.1 I2C LCD
4.
Circuit diagram and explanation of the principle
5.
I2C LCD Basic Usage Practice
5.1 Enabling I2C Communication
5.2 Outputting LCD (1602 I2C LCD) values
6.
Digital Signage Creation Practice
6.1 Creating a Character
6.2 Automatically scrolling text
6.3 Completing the Digital Signage
Chapter 18: Don't Move, Surveillance Camera System
1.
Learning Summary
2.
Assignment Description
3.
Description of supplies and main components
3.1 PIR sensor
3.2 Camera
4.
Circuit diagram
5.
Basic Sensor Practice
5.1 Camera Practice
5.2 USB Camera Practice
5.3 PIR Motion Sensor Practice
5.4 Sending Email with Python
6.
Don't Move, Surveillance Camera System Practice
Chapter 19 Registering Auto-Run
1.
Learning Summary
2.
Assignment Description
3.
Description of supplies and main components
3.1 LED sensor and resistor
4.
Circuit diagram
5.
Registering for auto-run
5.1 Code to be automatically executed
5.2 Method 1: Registering autorun in the rc.local file
5.3 Method 2: Automatically running using systemd
5.4 Method 3: Registering autorun in the .bashrc file
5.5 Method 4: Automatic execution using crontab
Chapter 20: Checking Sensor Values Using MQTT
1.
Learning Summary
2.
Assignment Description
3.
Description of supplies and main components
3.1 Temperature and humidity sensor and button
3.2 LED sensor and resistor
4.
Circuit diagram
5. Practice checking sensor values using MQTT
5.1 Installing MQTT on a Raspberry Pi
5.2 Installing the Python program and MQTT library on your smartphone
5.3 Practice checking sensor values using MQTT
5.4 Monitoring sensor values using a smartphone app
5.5 Monitoring sensor values using a PC
Appendix 01.
Creating a Home IoT System Using Home Assistant
Appendix 02.
Home IoT control using Magic Mirror
Appendix 03.
Creating signage
Attachment 01.
Libraries used by chapter (Raspberry PI OS with desktop, based on python3)
Attachment 02.
Chapter-by-Chapter Learning Summary
Attachment 03.
Parts list
Header
Chapter 00 What is a Raspberry Pi Board?
Chapter 01: Getting Started; Raspberry Pi OS Installation and Configuration
1.
Learning Summary
2.
Installing Raspberry Pi OS
2.1 Download Raspberry Pi OS
2.2 MicroSD Card Format
2.3 Installing Raspberry Pi OS (32-bit)
2.4 Installing Raspberry Pi OS (64-bit)
3.
Remotely accessing your Raspberry Pi
3.1 Setting up SSH access (wifi) without connecting peripheral devices (difficulty: intermediate)
3.2 SSH connection via command prompt
3.3 Remotely accessing the Raspberry Pi via VNC
4.
Setting up the Raspberry Pi OS
4.1 Introduction to Raspberry Pi OS Software (Full Version)
4.2 Raspberry Pi OS Configuration
5.
Changing the Raspberry Pi OS Resolution
6.
Setting up the Raspberry Pi OS in Korean
6.1 How to Install Korean on Raspberry Pi OS (Korean Input Method: ibus)
Chapter 02 Learning Linux
1.
Learning Summary
2.
Basic Linux commands
2.1 Using Linux Commands
2.2 Basic Commands
2.3 Other commands
3.
Linux directory structure
4.
Editing document files
4.1 nano
4.2 vi (vim) (Difficulty: Intermediate)
Chapter 03 Python Code Editor
1.
Learning Summary
2.
Thonny Python IDE
2.1 Opening the Thonny Python IDE
2.2 Using the Thonny Python IDE
2.3 Using VIM as a Python IDE (Difficulty: Intermediate)
3. Sending files from your PC to the Raspberry Pi OS
Chapter 04: Basic Python Grammar
1.
Learning Summary
2.
Python language
2.1 Download Python
2.2 Features of the Python Language
3.
Python data types
3.1 Numeric data types
3.2 String data type
3.3 List data type (List)
3.4 Tuple data type
3.5 Dictionary Data Type
3.6 Variable
4.
Conditional statements
4.1 Basic structure of if conditional statement
4.2 Comparison operators in conditional statements
4.3 Logical operators in conditional statements
4.4 Two or more conditional statements
4.5 Nested conditionals
5.
loop
5.1 for loop
5.2 while loop
6.
Input/output
6.1 User Input
6.2 Data output (print)
7.
Modules, packages, and libraries
7.1 Module
7.2 Package
7.3 Library
8.
logging
8.1 Changing logging levels, file output, and encoding settings
8.2 Using Variables
8.3 Formatting
Chapter 05 Using the Basic Raspberry Pi Devices
1.
Learning Summary
2.
Raspberry Pi 5B hardware
3.
Raspberry Pi 4B+ hardware
4.
Raspberry Pi 3B+ hardware
5. GPIO (general purpose input/output)
5.1 GPIO Python Code
6.
camera
7. USB microphone
8.
Speakers/Earphones
9.
Display / Monitor
10.
Breadboard
11.
Cobbler (T-Cobbler)
12.
Warning icon
13. RTC (Real Time Clock)
14.
Power button
Chapter 06: Creating a Cooling Fan Speed Control Module
1.
Learning Summary
2.
Assignment Description
3.
Description of supplies and main components
3.1 Transistor
3.2 Diode
3.3 Resistance
3.4 Fan
4.
Circuit diagram
5.
Principle explanation
6.
Fan speed control practice
6.1 Checking the Raspberry Pi System Temperature
6.2 Controlling with Python Code
6.3 Controlling Cooling Fan Operation with Raspberry Pi Configuration Settings
Chapter 07 A stand that automatically turns off the lights in the morning
1.
Learning Summary
2.
Assignment Description
3.
Description of supplies and main components
3.1 Light sensor
3.2 LED
3.3 ADC
3.4 Tact Button
4.
Circuit diagram
5.
Principle explanation
6.
Practice using basic buttons
6.1 Difference between pull-up and pull-down resistors
6.2 Implementing a Toggle Switch
7.
Practice controlling the LED to automatically turn off when it gets brighter
7.1 Setting up SPI
7.2 MCP3008, MCP3208
7.3 Turning the LED On/Off with the light sensor value
Chapter 08 Mood lighting that automatically adjusts brightness when it gets dark
1.
Learning Summary
2.
Assignment Description
3.
Description of supplies and main components
3.1 Light sensor
3.2 LED
3.3 ADC
4.
Circuit diagram
5.
Principle explanation
6. PWM Basic Practice
6.1 LED that gradually brightens and gradually turns off when you press the button
7.
Mood lighting practice that automatically adjusts brightness when it gets dark
7.1 Setting up SPI
7.2 Adjusting LED brightness using light sensor values
Chapter 09 Digital Piano
1.
Learning Summary
2.
Assignment Description
3.
Description of supplies and main components
3.1 4×4 touch keypad
3.2 Buzzer
4.
Circuit diagram
5.
Principle explanation
6.
4×4 Keypad Basics Practice
7.
Digital Piano Making Practice
7.1 Playing a musical scale with a buzzer
7.2 Using the electrostatic touch keypad
7.3 Completing the Digital Keyboard
Chapter 10: A fan that turns on automatically when it gets hot
1.
Learning Summary
2.
Assignment Description
3.
Description of supplies and main components
3.1 Temperature and humidity sensor
3.2 DC motor
3.3 Motor Driver
3.4 Tact Button
4.
Circuit diagram and explanation of the principle
5.
Practice with a fan that turns on automatically when it gets hot
5.1 Using the Temperature and Humidity Sensor
5.2 Using DC Motors
5.3 Complete the fan that turns on automatically when it gets hot.
6.
Button Interrupt (Difficulty: Intermediate)
6.1 GPIO.PUD_UP and GPIO.PUD_DOWN
6.2 Interrupt 1: RPi.GPIO wait_for_edge()
6.3 Interrupt 2: add_event_detect() and callback function
Chapter 11 Smart Outlets
1.
Learning Summary
2.
Assignment Description
3.
Description of supplies and main components
3.1 Relay
4.
Circuit diagram and explanation of the principle
5.
Smart outlet practice
5.1 Enabling Remote GPIO
5.2 Operating an LED connected to a relay with a button
5.3 Operating an LED connected to a relay using remote GPIO
5.4 Operating an LED using Remote GPIO (Application)
Chapter 12: Making a Non-Contact Thermometer
1.
Learning Summary
2.
Assignment Description
3.
Description of supplies and main components
3.1 Non-contact temperature sensor (GY-906)
3.2 4 digital 7 segments (FND × 4)
4.
Circuit diagram and explanation of the principle
5.
7-Segment Basic Usage Practice
5.1 Single-digit FND practice
5.2 Four-digit FND practice
6.
Making a Non-Contact Thermometer
6.1 Enabling I2C Communication
6.2 Outputting FND (TM1637) values
6.3 Reading non-contact thermometer values
6.4 Completing the Non-Contact Thermometer
Chapter 13: Creating a Healthcare Pedometer
1.
Learning Summary
2.
Assignment Description
3.
Description of supplies and main components
3.1 Tilt Sensor (GY-521/MPU6050)
3.2 4 digital 7 segments (FND × 4)
4.
Circuit diagram and explanation of the principle
5.
Pedometer practice using a tilt sensor
5.1 Enabling I2C Communication
5.2 Tilt Sensor Practice
5.3 Practical tutorial on creating a pedometer
Chapter 14: Creating a Smart Farm
1.
Learning Summary
2.
Assignment Description
3.
Description of supplies and main components
3.1 Soil moisture sensor
3.2 Temperature and humidity sensor (DHT11)
3.3 ADC
4.
Circuit diagram
5.
Smart Farm Practice
5.1 Setting up SPI for ADC use
5.2 Installing the Temperature and Humidity Sensor Library
5.3 Completing the Smart Farm Practice
Chapter 15 The fine dust at my house is clear today.
1.
Learning Summary
2.
Assignment Description
3.
Description of supplies and main components
3.1 Fine dust sensor
3.2 USB to TTL Serial Cable
4.
Circuit diagram
5.
Fine dust practice
5.1 Finding the UART Port
5.2 Installing the Fine Dust Sensor Library
5.3 Complete the practice of "The fine dust at my house is clear today"
Chapter 16 Smart Trash Can
1.
Learning Summary
2.
Assignment Description
3.
Description of supplies and main components
3.1 Load cell
3.2 Ultrasonic sensor
3.3 Servo motor
3.4 Logic level shifter
3.5 LED, resistor
4.
Circuit diagram
5.
Basic Sensor Practice
5.1 Load Cell Practice
5.2 Ultrasonic Sensor Practice
5.3 Servo Motor Practice
6.
Smart Trash Can Practice
Chapter 17: Creating Digital Signage
1.
Learning Summary
2.
Assignment Description
3.
Description of supplies and main components
3.1 I2C LCD
4.
Circuit diagram and explanation of the principle
5.
I2C LCD Basic Usage Practice
5.1 Enabling I2C Communication
5.2 Outputting LCD (1602 I2C LCD) values
6.
Digital Signage Creation Practice
6.1 Creating a Character
6.2 Automatically scrolling text
6.3 Completing the Digital Signage
Chapter 18: Don't Move, Surveillance Camera System
1.
Learning Summary
2.
Assignment Description
3.
Description of supplies and main components
3.1 PIR sensor
3.2 Camera
4.
Circuit diagram
5.
Basic Sensor Practice
5.1 Camera Practice
5.2 USB Camera Practice
5.3 PIR Motion Sensor Practice
5.4 Sending Email with Python
6.
Don't Move, Surveillance Camera System Practice
Chapter 19 Registering Auto-Run
1.
Learning Summary
2.
Assignment Description
3.
Description of supplies and main components
3.1 LED sensor and resistor
4.
Circuit diagram
5.
Registering for auto-run
5.1 Code to be automatically executed
5.2 Method 1: Registering autorun in the rc.local file
5.3 Method 2: Automatically running using systemd
5.4 Method 3: Registering autorun in the .bashrc file
5.5 Method 4: Automatic execution using crontab
Chapter 20: Checking Sensor Values Using MQTT
1.
Learning Summary
2.
Assignment Description
3.
Description of supplies and main components
3.1 Temperature and humidity sensor and button
3.2 LED sensor and resistor
4.
Circuit diagram
5. Practice checking sensor values using MQTT
5.1 Installing MQTT on a Raspberry Pi
5.2 Installing the Python program and MQTT library on your smartphone
5.3 Practice checking sensor values using MQTT
5.4 Monitoring sensor values using a smartphone app
5.5 Monitoring sensor values using a PC
Appendix 01.
Creating a Home IoT System Using Home Assistant
Appendix 02.
Home IoT control using Magic Mirror
Appendix 03.
Creating signage
Attachment 01.
Libraries used by chapter (Raspberry PI OS with desktop, based on python3)
Attachment 02.
Chapter-by-Chapter Learning Summary
Attachment 03.
Parts list
Publisher's Review
This book also includes instructions on how to use the Raspberry Pi board, basic Linux commands for handling the Raspberry Pi, and Python coding required for sensor operation.
You can learn the sensor's operating principles and coding methods through various examples, and explanations are included so that even those who are new to Raspberry Pi can easily follow the code.
Having donated my coding talents to the Code Club Korea Committee for many years, I've also incorporated tips into the book that I hope those new to Raspberry Pi will know.
Therefore, it would be a good content for teachers who actually teach Raspberry Pi in the field to use as a teaching material.
- Step-by-step instructions for completing the project by chapter
- Includes various codes (RPi.GPIO code and gpiozero code)
- Composed of content and practice focused on implementing Home IoT
- Includes project video
Clearly, there are more opportunities to learn coding than there were in my childhood, and the world is one where anyone with the passion can create something.
We live in a world where we can easily search the internet for any question we have, anytime, anywhere. However, if we don't set clear goals amidst this deluge of information, we'll find ourselves lost in the sea of information.
This book is intended to serve as a compass for beginners of Raspberry Pi, showing them where to start and what direction to take when they are first starting out and are unsure of their goals.
Finally, I hope that this book will serve as a helpful hint for those who are just starting out with Raspberry Pi and encounter questions or difficult-to-solve problems.
- From the header
You can learn the sensor's operating principles and coding methods through various examples, and explanations are included so that even those who are new to Raspberry Pi can easily follow the code.
Having donated my coding talents to the Code Club Korea Committee for many years, I've also incorporated tips into the book that I hope those new to Raspberry Pi will know.
Therefore, it would be a good content for teachers who actually teach Raspberry Pi in the field to use as a teaching material.
- Step-by-step instructions for completing the project by chapter
- Includes various codes (RPi.GPIO code and gpiozero code)
- Composed of content and practice focused on implementing Home IoT
- Includes project video
Clearly, there are more opportunities to learn coding than there were in my childhood, and the world is one where anyone with the passion can create something.
We live in a world where we can easily search the internet for any question we have, anytime, anywhere. However, if we don't set clear goals amidst this deluge of information, we'll find ourselves lost in the sea of information.
This book is intended to serve as a compass for beginners of Raspberry Pi, showing them where to start and what direction to take when they are first starting out and are unsure of their goals.
Finally, I hope that this book will serve as a helpful hint for those who are just starting out with Raspberry Pi and encounter questions or difficult-to-solve problems.
- From the header
GOODS SPECIFICS
- Date of issue: October 31, 2025
- Page count, weight, size: 592 pages | 188*257*35mm
- ISBN13: 9791198721129
- ISBN10: 119872112X
You may also like
카테고리
korean


korean

![GQ KOREA Mark (Monthly): December [2025]](http://librairie.coreenne.fr/cdn/shop/files/8ef265dbbfbf186523ed75ba7319009d.jpg?v=1765340328&width=3840)


