

Arduino IoT: Learning through Making and 40 IoT Projects
 |
Description
Book Introduction
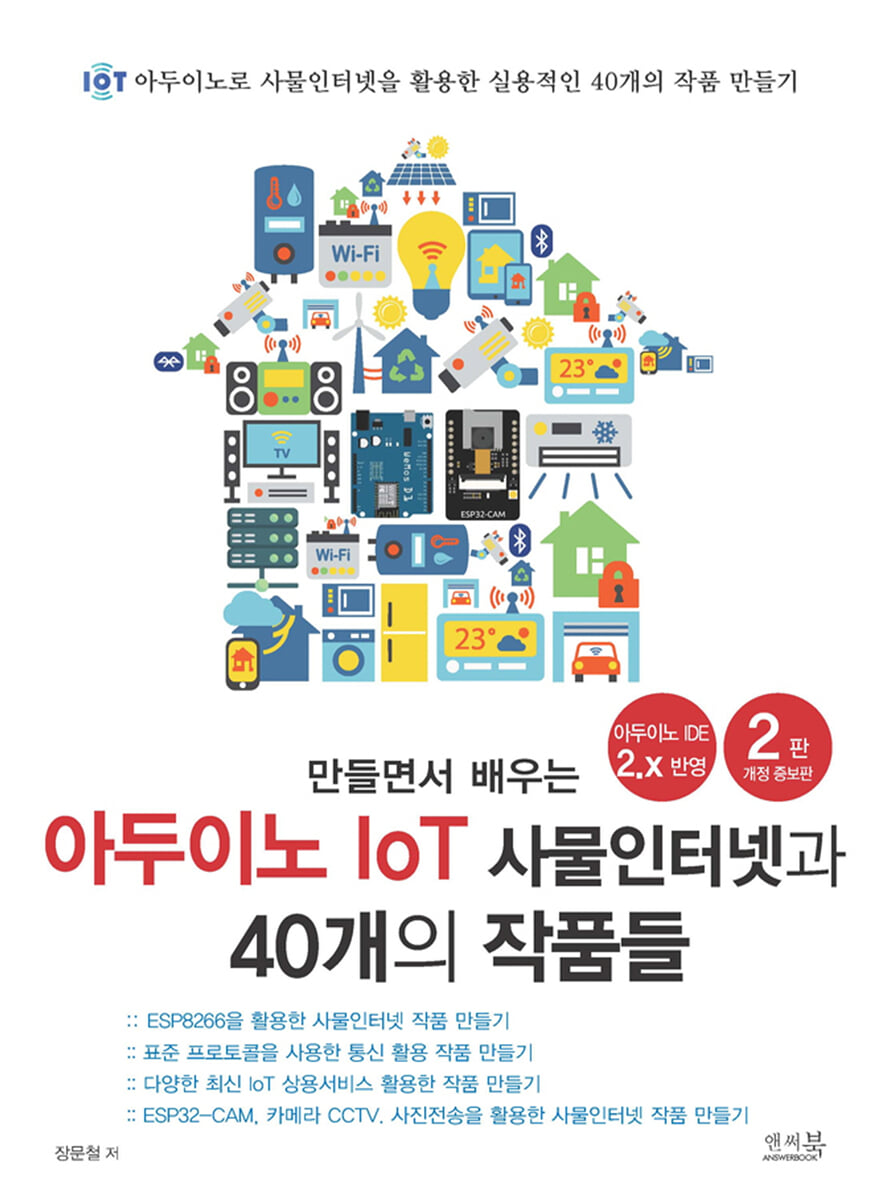
The 2nd edition of "Learning Arduino IoT by Making: The Internet of Things and 40 Works" is a revised and expanded edition that reflects the Arduino IDE 2.x version and has been updated with practical IoT works in line with the latest trends such as AI.
The book is designed to help readers create 40 IoT-based products using Arduino, and naturally acquire a sense of AI, IoT, and programming language through coding.
The book, "Learn Arduino IoT and 40 Works by Making," breaks down the basics of Arduino and includes 5 IoT works using ESP8266, 12 IoT works that can be used right away, 8 IoT works that utilize communication using standard protocols, 9 practical IoT works that utilize various latest IoT commercial services, and 6 IoT works that utilize ESP32-CAM, camera CCTV, and photo transmission. It is structured so that you can learn practical IoT and programming languages very naturally by making a total of 40 works on various topics.
The book is designed to help readers create 40 IoT-based products using Arduino, and naturally acquire a sense of AI, IoT, and programming language through coding.
The book, "Learn Arduino IoT and 40 Works by Making," breaks down the basics of Arduino and includes 5 IoT works using ESP8266, 12 IoT works that can be used right away, 8 IoT works that utilize communication using standard protocols, 9 practical IoT works that utilize various latest IoT commercial services, and 6 IoT works that utilize ESP32-CAM, camera CCTV, and photo transmission. It is structured so that you can learn practical IoT and programming languages very naturally by making a total of 40 works on various topics.
index
Chapter 00 Preparing for the Arduino Internet of Things
01 _Basic knowledge of Arduino IoT projects
02 _Installing the Arduino development environment for the ESP8266
Installing Arduino IDE (Integrated Development Environment) 2.x
Change the interface from English to Korean
Enable the editor's quick suggestion feature
Add a board
Setting up ports
Chapter 01 Creating Works Using Basic Functions
Work 01 _ Controlling LED (digital output)
Create a code to make a red LED blink
Defining pins with #define statements
Red, yellow, and green LEDs blink alternately
Using functions to improve code readability
Work 02 - Communicating with a PC via Serial Communication (Serial Communication)
Sending hello from Arduino to PC
Transferring data to a PC by wrapping it in a line
Changing Arduino's communication speed
Sending data from PC to Arduino and receiving response
Controlling an LED by sending commands from a PC to Arduino
Controlling an LED by sending a string from a PC to an Arduino
Work 03 _ Receiving button input (digital input)
Check button value
Invert button values
Turn on the LED when you press the button
Turn on the LED with one press of the button
Work 04 _ Controlling LED brightness (analog output)
Adjusting the brightness of the LED
Adjust LED brightness by pressing the button
Adjusting the range of analog output
Adjusting the frequency of analog output
Project 05 - Controlling LED brightness with a variable resistor (analog input)
Reading the variable resistor value
Controlling an LED with a variable resistor value
Controlling LEDs using the map function
Chapter 02: Creating Ready-to-Use IoT Products
Work 06 - Creating an Internet Standard Time Display Device
Connect to the Internet, get the time, and output it via serial communication.
Print in Korean time
Displaying Korean time on the LCD
Work 07 _ Making a weather display device for the Korea Meteorological Administration
Access and check the weather data in your neighborhood
Connect to Arduino and output data via serial communication
Separate only the temperature and humidity data and output it via serial communication.
Output temperature and humidity data to LCD
Project 08 - Obtaining fine dust values from public data and displaying them on NeoPixel LEDs
Apply for use and check data on the public data portal.
Reading fine dust values from Arduino
Separate only PM10 fine dust data and display it on the LCD.
Display LED colors according to fine dust conditions
Work 09 _ Sending Google Mail when a package is detected using an ultrasonic sensor
Setting up Google Email
Send Google Email
Measuring distance with an ultrasonic sensor
Adding conditions based on distance values using an ultrasonic sensor
Detect parcels with ultrasonic sensors and send emails
Work 10 - Measuring soil moisture levels daily and sending them to Naver Mail
Setting up Naver email
Create code that runs every minute
Reading soil moisture sensor values
Create a work that measures soil moisture at a set time each day and sends an email.
Work 11: Creating a Real-Time Bitcoin Price Display
Check Bitcoin data using the Upbit API.
Separate JSON values and output only the current Bitcoin price.
Displaying the current Bitcoin price on an LCD screen
Work 12: Creating a Real-Time Stock Price Display Device for Samsung Electronics
Access Naver stock data to check the value
Separate data by current stock price only
Displaying Samsung Electronics' real-time prices on the LCD
Work 13 _ Send a SLACK alarm when you press the doorbell (button)
Creating a SLACK channel and adding a bot
Sending messages to SLACK using Arduino
Check if the button is pressed
Make a button press into a function and use it
Send a message to SLACK when a button is pressed
After installing SLACK on your smartphone, check
Work 14 _ Detecting door opening and sending SLACK alarm
Check the door sensor value
Outputting values only when the door is opened using a door sensor
Send a message to SLACK only when the door is opened using the door sensor.
Work 15 - Detecting rain and sending a message via Telegram
Setting up Telegram
Sending messages via Telegram using Arduino
Check the rainwater detection sensor value
Send a message to Telegram when rain is detected
Work 16 _ Sending a message to Telegram when motion is detected with the acceleration gyroscope sensor
Checking the acceleration value of the MPU6050 acceleration gyroscope sensor
Create code to check changes in acceleration values
Send a message to Telegram when the sensor detects movement
Work 17 - Controlling the LED by receiving a message from Telegram
Receive messages via Telegram
Control the LED by receiving messages via Telegram
Chapter 03 Creating Works Using Standard Communication Protocols and Other Features
Work 18 - Communicating with a PC using TCP communication
Download the program for communication testing
Sending data via TCP (Arduino -> PC)
Transmitting data via TCP (PC -> Arduino)
Controlling the LED by receiving data via TCP
Send data via TCP when you press the button
Work 19 - Communicating with a PC using UDP communication
Download a program for text
Sending and receiving data via UDP communication
Controlling the LED by receiving data via UDP
Send data via UDP by pressing the switch
Work 20 - Communicating with a PC using MQTT communication
Installing and Setting Up the Mosquito MQTT Broker on Your PC
Installing MQTT program on your PC
Check your computer's IP address
Generating and Receiving Data via MQTT Communication on Arduino
Controlling LEDs and sending button presses via MQTT communication on Arduino
Work 21 - Controlling LEDs and Buzzers with a Web Server
Outputting text to a web server
Controlling LEDs using a web server
Adding buzzer control using a web server
Work 22 - Monitoring the Light Sensor with a Web Server
Measuring light sensor values
Displaying light sensor values on a web server
Work 23: Building a WiFi Signal Meter
Controlling NeoPixel LEDs
Create and control with NeoPixel LED functions
Measuring WiFi signals
Outputting NeoPixel LEDs based on WiFi signals
Work 24 - Using Deep Sleep Mode
Deep sleep mode features and current consumption
Operate in deep sleep mode, waking up every 10 seconds and sending values via serial communication.
It operates in deep sleep mode, waking up every 10 seconds and blinking the LED.
Work 25 - Useful features for reconnecting to WiFi, static IP, and working as an AP
Reconnect to wifi
Use as a fixed IP
Use as an AP (Access Point)
Chapter 04 Creating Works Using IOT Services
Work 26 - Sending a notification to your smartphone when gas is detected using IFTTT
Registering the service on the IFTTT site
Connecting Webhooks to IFTTT on Arduino
Install the smartphone app and log in
Check the gas sensor value
Send an alert via IFTTT when gas is detected
Work 27 - Using IFTTT to measure temperature and humidity values every minute and record them in Google Sheets
Setting up IFTTT
Reading DHT11 temperature and humidity sensor values
Reading temperature and humidity values and recording them in a Google Spreadsheet
Work 28 _ Controlling buttons and LEDs with node-red GUI (using TCP-Server)
Installing Node-Red
Install
Create a TCP server and code to control buttons and LEDs. Write Node-Red code.
Work 29 _ Displaying a light sensor GUI using node-red (using TCP-Client)
Check your PC IP address
TCP client implementation and code for transmitting light sensor values to the server
Writing Node-Red Code
Work 30: Creating a Smart Farm Using Node-RED (Using MQTT Communication)
Installing Arduino Libraries
Installing node-red
Install MQTT
Create a code that measures temperature and humidity sensor values and transmits them to the server to control the motor.
Writing Node-Red Code
Work 31 - Recording and monitoring light sensor values using Thingspeak
Thingspeak membership registration and service settings
Recording data to Thingspeak with Arduino
Reading the light sensor and recording it in Thingspeak
Work 32: Recording the temperature and humidity in a child's room using Thingspeak
Creating a Thingspeak channel and writing data
Checking DHT11 temperature and humidity sensor values
Sending DHT11 temperature and humidity sensor values to Thingspeak
Work 33 _ Monitoring the temperature, humidity, and light levels of your home from anywhere
ESP8266 Arduino program
Writing data to firebase
Record temperature and humidity in Firebase
Create and test apps with App Inventor
Work 34: Creating a Smart Switch Controller Anywhere in the Internet of Things
Sending light values to Firebase
Chapter 05: Creating IoT Projects Using the ESP32 CAM
Setting up the ESP32-CAM development environment
Assembling the ESP32-CAM
Work 35: Creating an Ultrasonic Sensor Intruder Detection System Using Bluetooth 2.0 (Bluetooth Classic)
Checking the ultrasonic sensor value
Exchange data with your smartphone via Bluetooth 2.0 communication
Work 36 _ Bluetooth 4.0 (Bluetooth LE) Smart Lighting Control
Controlling NeoPixel LEDs
Exchange data with your smartphone using Bluetooth 4.0 (Bluetooth LE)
Controlling NeoPixel LEDs by receiving commands via Bluetooth 4.0 (Bluetooth LE) from a smartphone
Work 37 _ Making CCTV
Writing CCTV Code
Work 38 _ Taking a photo and saving it to SD memory
Formatting the SD card and connecting it to the ESP32 CAM
Create code to take a picture and save it to an SD card
Work 39 _ Press the doorbell (button) to take a picture and send it to Telegram
Setting up Telegram
Write code to confirm click when a button is pressed
Send photos to Telegram by pressing the button
Work 40 _ Click the button to take a picture and send it to email
Setting up Google Email
Send photos by email with a click of a button
01 _Basic knowledge of Arduino IoT projects
02 _Installing the Arduino development environment for the ESP8266
Installing Arduino IDE (Integrated Development Environment) 2.x
Change the interface from English to Korean
Enable the editor's quick suggestion feature
Add a board
Setting up ports
Chapter 01 Creating Works Using Basic Functions
Work 01 _ Controlling LED (digital output)
Create a code to make a red LED blink
Defining pins with #define statements
Red, yellow, and green LEDs blink alternately
Using functions to improve code readability
Work 02 - Communicating with a PC via Serial Communication (Serial Communication)
Sending hello from Arduino to PC
Transferring data to a PC by wrapping it in a line
Changing Arduino's communication speed
Sending data from PC to Arduino and receiving response
Controlling an LED by sending commands from a PC to Arduino
Controlling an LED by sending a string from a PC to an Arduino
Work 03 _ Receiving button input (digital input)
Check button value
Invert button values
Turn on the LED when you press the button
Turn on the LED with one press of the button
Work 04 _ Controlling LED brightness (analog output)
Adjusting the brightness of the LED
Adjust LED brightness by pressing the button
Adjusting the range of analog output
Adjusting the frequency of analog output
Project 05 - Controlling LED brightness with a variable resistor (analog input)
Reading the variable resistor value
Controlling an LED with a variable resistor value
Controlling LEDs using the map function
Chapter 02: Creating Ready-to-Use IoT Products
Work 06 - Creating an Internet Standard Time Display Device
Connect to the Internet, get the time, and output it via serial communication.
Print in Korean time
Displaying Korean time on the LCD
Work 07 _ Making a weather display device for the Korea Meteorological Administration
Access and check the weather data in your neighborhood
Connect to Arduino and output data via serial communication
Separate only the temperature and humidity data and output it via serial communication.
Output temperature and humidity data to LCD
Project 08 - Obtaining fine dust values from public data and displaying them on NeoPixel LEDs
Apply for use and check data on the public data portal.
Reading fine dust values from Arduino
Separate only PM10 fine dust data and display it on the LCD.
Display LED colors according to fine dust conditions
Work 09 _ Sending Google Mail when a package is detected using an ultrasonic sensor
Setting up Google Email
Send Google Email
Measuring distance with an ultrasonic sensor
Adding conditions based on distance values using an ultrasonic sensor
Detect parcels with ultrasonic sensors and send emails
Work 10 - Measuring soil moisture levels daily and sending them to Naver Mail
Setting up Naver email
Create code that runs every minute
Reading soil moisture sensor values
Create a work that measures soil moisture at a set time each day and sends an email.
Work 11: Creating a Real-Time Bitcoin Price Display
Check Bitcoin data using the Upbit API.
Separate JSON values and output only the current Bitcoin price.
Displaying the current Bitcoin price on an LCD screen
Work 12: Creating a Real-Time Stock Price Display Device for Samsung Electronics
Access Naver stock data to check the value
Separate data by current stock price only
Displaying Samsung Electronics' real-time prices on the LCD
Work 13 _ Send a SLACK alarm when you press the doorbell (button)
Creating a SLACK channel and adding a bot
Sending messages to SLACK using Arduino
Check if the button is pressed
Make a button press into a function and use it
Send a message to SLACK when a button is pressed
After installing SLACK on your smartphone, check
Work 14 _ Detecting door opening and sending SLACK alarm
Check the door sensor value
Outputting values only when the door is opened using a door sensor
Send a message to SLACK only when the door is opened using the door sensor.
Work 15 - Detecting rain and sending a message via Telegram
Setting up Telegram
Sending messages via Telegram using Arduino
Check the rainwater detection sensor value
Send a message to Telegram when rain is detected
Work 16 _ Sending a message to Telegram when motion is detected with the acceleration gyroscope sensor
Checking the acceleration value of the MPU6050 acceleration gyroscope sensor
Create code to check changes in acceleration values
Send a message to Telegram when the sensor detects movement
Work 17 - Controlling the LED by receiving a message from Telegram
Receive messages via Telegram
Control the LED by receiving messages via Telegram
Chapter 03 Creating Works Using Standard Communication Protocols and Other Features
Work 18 - Communicating with a PC using TCP communication
Download the program for communication testing
Sending data via TCP (Arduino -> PC)
Transmitting data via TCP (PC -> Arduino)
Controlling the LED by receiving data via TCP
Send data via TCP when you press the button
Work 19 - Communicating with a PC using UDP communication
Download a program for text
Sending and receiving data via UDP communication
Controlling the LED by receiving data via UDP
Send data via UDP by pressing the switch
Work 20 - Communicating with a PC using MQTT communication
Installing and Setting Up the Mosquito MQTT Broker on Your PC
Installing MQTT program on your PC
Check your computer's IP address
Generating and Receiving Data via MQTT Communication on Arduino
Controlling LEDs and sending button presses via MQTT communication on Arduino
Work 21 - Controlling LEDs and Buzzers with a Web Server
Outputting text to a web server
Controlling LEDs using a web server
Adding buzzer control using a web server
Work 22 - Monitoring the Light Sensor with a Web Server
Measuring light sensor values
Displaying light sensor values on a web server
Work 23: Building a WiFi Signal Meter
Controlling NeoPixel LEDs
Create and control with NeoPixel LED functions
Measuring WiFi signals
Outputting NeoPixel LEDs based on WiFi signals
Work 24 - Using Deep Sleep Mode
Deep sleep mode features and current consumption
Operate in deep sleep mode, waking up every 10 seconds and sending values via serial communication.
It operates in deep sleep mode, waking up every 10 seconds and blinking the LED.
Work 25 - Useful features for reconnecting to WiFi, static IP, and working as an AP
Reconnect to wifi
Use as a fixed IP
Use as an AP (Access Point)
Chapter 04 Creating Works Using IOT Services
Work 26 - Sending a notification to your smartphone when gas is detected using IFTTT
Registering the service on the IFTTT site
Connecting Webhooks to IFTTT on Arduino
Install the smartphone app and log in
Check the gas sensor value
Send an alert via IFTTT when gas is detected
Work 27 - Using IFTTT to measure temperature and humidity values every minute and record them in Google Sheets
Setting up IFTTT
Reading DHT11 temperature and humidity sensor values
Reading temperature and humidity values and recording them in a Google Spreadsheet
Work 28 _ Controlling buttons and LEDs with node-red GUI (using TCP-Server)
Installing Node-Red
Install
Create a TCP server and code to control buttons and LEDs. Write Node-Red code.
Work 29 _ Displaying a light sensor GUI using node-red (using TCP-Client)
Check your PC IP address
TCP client implementation and code for transmitting light sensor values to the server
Writing Node-Red Code
Work 30: Creating a Smart Farm Using Node-RED (Using MQTT Communication)
Installing Arduino Libraries
Installing node-red
Install MQTT
Create a code that measures temperature and humidity sensor values and transmits them to the server to control the motor.
Writing Node-Red Code
Work 31 - Recording and monitoring light sensor values using Thingspeak
Thingspeak membership registration and service settings
Recording data to Thingspeak with Arduino
Reading the light sensor and recording it in Thingspeak
Work 32: Recording the temperature and humidity in a child's room using Thingspeak
Creating a Thingspeak channel and writing data
Checking DHT11 temperature and humidity sensor values
Sending DHT11 temperature and humidity sensor values to Thingspeak
Work 33 _ Monitoring the temperature, humidity, and light levels of your home from anywhere
ESP8266 Arduino program
Writing data to firebase
Record temperature and humidity in Firebase
Create and test apps with App Inventor
Work 34: Creating a Smart Switch Controller Anywhere in the Internet of Things
Sending light values to Firebase
Chapter 05: Creating IoT Projects Using the ESP32 CAM
Setting up the ESP32-CAM development environment
Assembling the ESP32-CAM
Work 35: Creating an Ultrasonic Sensor Intruder Detection System Using Bluetooth 2.0 (Bluetooth Classic)
Checking the ultrasonic sensor value
Exchange data with your smartphone via Bluetooth 2.0 communication
Work 36 _ Bluetooth 4.0 (Bluetooth LE) Smart Lighting Control
Controlling NeoPixel LEDs
Exchange data with your smartphone using Bluetooth 4.0 (Bluetooth LE)
Controlling NeoPixel LEDs by receiving commands via Bluetooth 4.0 (Bluetooth LE) from a smartphone
Work 37 _ Making CCTV
Writing CCTV Code
Work 38 _ Taking a photo and saving it to SD memory
Formatting the SD card and connecting it to the ESP32 CAM
Create code to take a picture and save it to an SD card
Work 39 _ Press the doorbell (button) to take a picture and send it to Telegram
Setting up Telegram
Write code to confirm click when a button is pressed
Send photos to Telegram by pressing the button
Work 40 _ Click the button to take a picture and send it to email
Setting up Google Email
Send photos by email with a click of a button
Detailed image

Publisher's Review
As the Fourth Industrial Revolution is applied to various industrial fields, various technologies such as AI (artificial intelligence), IoT, and artificial intelligence are beginning to receive attention and develop.
In particular, there is a high interest in coding, AI, and IT issues.
There is also a lot of interest in IoT construction, including AI, smart homes, smart cities, and smart farms.
Coding is the process of inputting commands into a language that the computer can understand, and can be called programming.
In other words, the most basic thing you need to learn to create a program is coding.
IoT stands for Internet of Things.
It refers to a technology or service environment that connects identifiable objects based on an Internet network and allows them to share various data. It is the most important technology in smart homes, smart farms, and smart cities.
Arduino is a small board that can directly connect various sensors and components and includes input/output and a central processing unit.
Arduino is very closely related to the Internet of Things (IoT).
Arduino can control input and output and execute and process commands using various components and sensors, so it can be used for the development of IoT, AI, self-driving cars, drones, robots, and more.
The 2nd edition of "Learning Arduino IoT and 40 Works by Making" is an IoT Bible that allows middle and high school students and non-majors, as well as majors and prospective developers, to create practical examples and code programs, ranging from easy to high-level AI-based works.
The structure of this book is as follows:
- Chapter 00 Preparing for Arduino IoT
Before creating various IoT products using Arduino, let's learn about the basics of Arduino and how to set up an Arduino development environment for ESP8266.
- Chapter 01 Creating Works Using Basic Functions (Creating 5 Works)
Let's create five IoT projects using ESP8266 and learn about basic functions such as digital output, digital input, serial communication, analog output, and analog input, as well as how to use the ESP8266 board.
- Chapter 02: Creating Ready-to-Use Internet of Things Works (12 Works)
We will create various works that utilize the Internet of Things, such as Internet time, public data, stock prices, and messengers, and learn how to use the Internet of Things by connecting to the Internet with the Arduino Wemos D1 R1 board.
- Chapter 03 Creating Works Using Standard Communication Protocols and Other Features (Creating 8 Works)
Create IoT projects utilizing eight communication protocols, and learn about commonly used standard communication methods such as TCP, UDP, MQTT, and web servers, as well as useful functions used in Wi-Fi communication.
- Chapter 04 Creating Works Using IoT Services (Creating 9 Works)
IFTTT.
We will create various practical IoT devices by utilizing the services of IoT service providers such as Node-Red, Thingspeak (Mathworks MATLAB), and Firebase (Google).
- Chapter 05: Creating IoT Projects Using ESP32 CAM (6 Projects)
ESP32 supports Bluetooth 2.0, 4.0 and WiFi communication.
We will create a device that utilizes Bluetooth 2.0 and 4.0 (BLE) and create a work of art using video and photos using ESP32 CAM.
In particular, there is a high interest in coding, AI, and IT issues.
There is also a lot of interest in IoT construction, including AI, smart homes, smart cities, and smart farms.
Coding is the process of inputting commands into a language that the computer can understand, and can be called programming.
In other words, the most basic thing you need to learn to create a program is coding.
IoT stands for Internet of Things.
It refers to a technology or service environment that connects identifiable objects based on an Internet network and allows them to share various data. It is the most important technology in smart homes, smart farms, and smart cities.
Arduino is a small board that can directly connect various sensors and components and includes input/output and a central processing unit.
Arduino is very closely related to the Internet of Things (IoT).
Arduino can control input and output and execute and process commands using various components and sensors, so it can be used for the development of IoT, AI, self-driving cars, drones, robots, and more.
The 2nd edition of "Learning Arduino IoT and 40 Works by Making" is an IoT Bible that allows middle and high school students and non-majors, as well as majors and prospective developers, to create practical examples and code programs, ranging from easy to high-level AI-based works.
The structure of this book is as follows:
- Chapter 00 Preparing for Arduino IoT
Before creating various IoT products using Arduino, let's learn about the basics of Arduino and how to set up an Arduino development environment for ESP8266.
- Chapter 01 Creating Works Using Basic Functions (Creating 5 Works)
Let's create five IoT projects using ESP8266 and learn about basic functions such as digital output, digital input, serial communication, analog output, and analog input, as well as how to use the ESP8266 board.
- Chapter 02: Creating Ready-to-Use Internet of Things Works (12 Works)
We will create various works that utilize the Internet of Things, such as Internet time, public data, stock prices, and messengers, and learn how to use the Internet of Things by connecting to the Internet with the Arduino Wemos D1 R1 board.
- Chapter 03 Creating Works Using Standard Communication Protocols and Other Features (Creating 8 Works)
Create IoT projects utilizing eight communication protocols, and learn about commonly used standard communication methods such as TCP, UDP, MQTT, and web servers, as well as useful functions used in Wi-Fi communication.
- Chapter 04 Creating Works Using IoT Services (Creating 9 Works)
IFTTT.
We will create various practical IoT devices by utilizing the services of IoT service providers such as Node-Red, Thingspeak (Mathworks MATLAB), and Firebase (Google).
- Chapter 05: Creating IoT Projects Using ESP32 CAM (6 Projects)
ESP32 supports Bluetooth 2.0, 4.0 and WiFi communication.
We will create a device that utilizes Bluetooth 2.0 and 4.0 (BLE) and create a work of art using video and photos using ESP32 CAM.
GOODS SPECIFICS
- Date of issue: April 30, 2024
- Page count, weight, size: 413 pages | 881g | 190*250*18mm
- ISBN13: 9791193059241
- ISBN10: 1193059240
You may also like
카테고리
korean


korean

![GQ KOREA Mark (Monthly): December [2025]](http://librairie.coreenne.fr/cdn/shop/files/8ef265dbbfbf186523ed75ba7319009d.jpg?v=1765340328&width=3840)


