

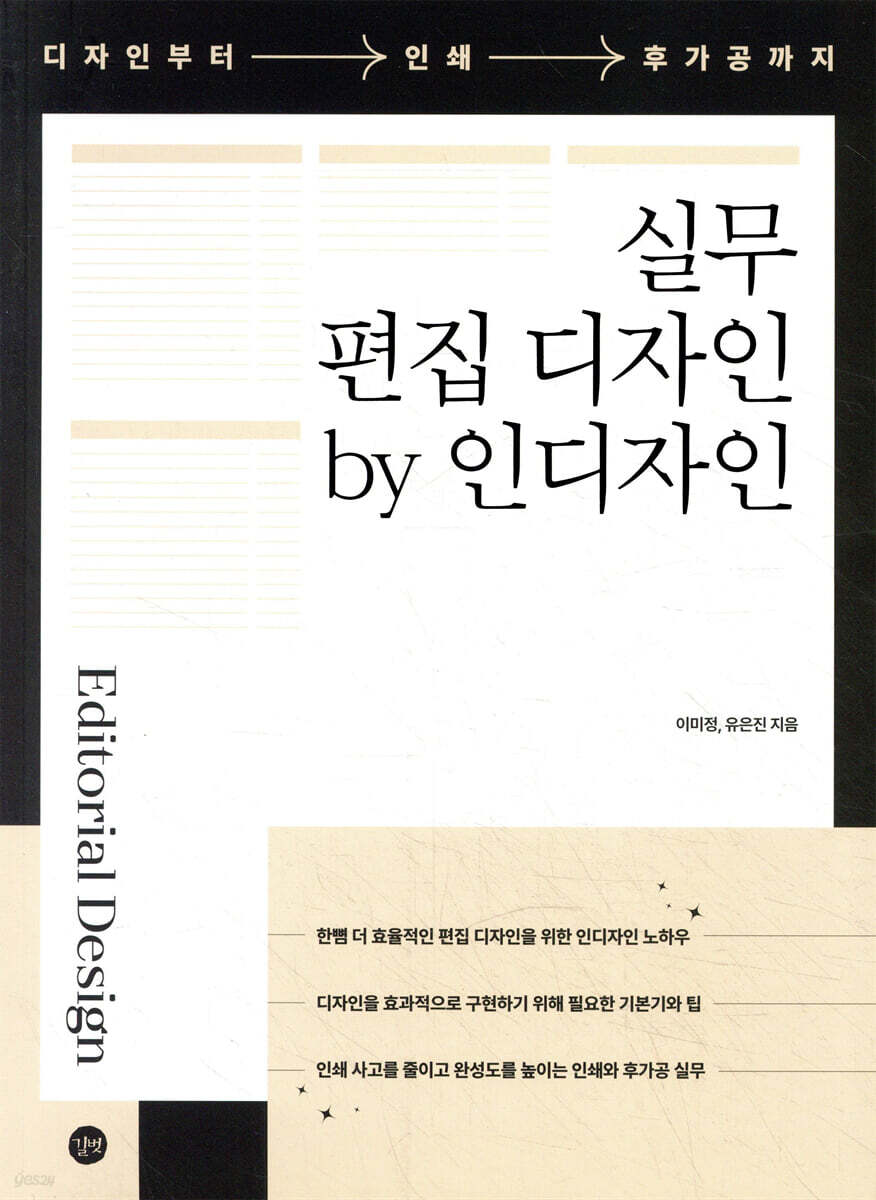
Practical Editing Design by InDesign
 |
Description
Book Introduction
InDesign Know-How for More Efficient Editing Design
"Practical Editorial Design by InDesign" covers the fundamental principles of editorial design, including format and layout, page management, graphic use, and typography, and finally covers the printing and post-processing processes, making it a useful reference for practical work.
It will help you build a solid foundation and acquire the practical know-how needed to become a professional designer.
"Practical Editorial Design by InDesign" covers the fundamental principles of editorial design, including format and layout, page management, graphic use, and typography, and finally covers the printing and post-processing processes, making it a useful reference for practical work.
It will help you build a solid foundation and acquire the practical know-how needed to become a professional designer.
- You can preview some of the book's contents.
Preview
index
preface
Preview
A Designer's Checklist to Prevent Printing Mistakes
Part 1
Before you start
01 Q&A to become an expert in editing and design
1. What is Practical Editorial Design? Practice and Theory
2 How is InDesign evolving? Beyond print and digital publishing.
3. Why don't the colors on my monitor and printed output match? InDesign's color modes.
4. Paper as a Transmission Medium: What Do You Need to Know? Print Quality by Paper Type
5. How to Finalize a Manuscript: Proper Printing Supervision and Manuscript Storage
6 Is this resolution enough for editing designs? Image resolution by purpose
02 A Look at Editing Design Practices
1 Active Magazine Editing
2 Interactive and Responsive Digital Publishing Editing
3 Editing a brochure with harmonious images and text
4 Editing leaflets in various folding forms
Editing a typography cover that makes five characters the main characters
6 Editing the company's annual report containing professional business information
7 Editing of various brand promotional materials that sensitively reflect trends
03 Colors you must know in the field
1. Using color information provided by Adobe
2 Differences between CMYK and spot colors in printing
3 Colors on different monitors and printed on paper from birth
04 A Guide to Free Fonts That Will Become a Treasure for Editorial Designers
1 Useful Body Fonts
2. Scope of use of free fonts
3. Troubleshooting Common Korean Font Issues in InDesign
Part 2
Create a new document and layout it
Managing files
01 Background information to know before deciding on a format
Difference between 1 page and spread
Why is the first page of a two-page panel odd?
3. Why are the left pages even and the right pages odd?
02 Format settings that vary depending on the binding method
1 Wireless binding is a multiple of 2, with pages facing each other
2 Create a separate cover file and calculate the spine size
3. Saddle stitch binding is a multiple of 4, with pages facing each other.
4. The folding format disables the page facing setting.
5 A plate format that utilizes a wide surface area by considering the 180° unfolding format
03 Planning a layout to enhance completeness
1 Create a stylish layout using margins and columns
2 Insert page numbers and titles considering the bottom margin
3. Consider the center margin area for wireless binding.
4. Using Margins and Grids to Determine the Completeness of a Book
5 Why Bleeds Are Important in InDesign
Part 3
Edit multiple pages at once
Page management that enables
01 Managing pages that show one book at a time
1 Change your start page to manage files efficiently.
2 Inserting pages of different formats within a document
3 Collaborating using the Library panel
4 Positioning the graphic source to follow the text
Follow the field practice
·Create book files for easy management
02 Using Master Pages
1 Changing styles on the master page
2. Disable master page application for some pages only
3. Creating and applying multiple master pages in the same document
4. Importing and applying a master page from another document
5. Make the page you are working on a master page to automatically insert page numbers.
6 Modifying Master Items Using Master Page Overrides
7 Adjusting Master Page Numbers Hidden by Objects
Follow the field practice
· Quickly create catalogs using layers and master page overrides.
03 Creating various page numbers and titles using master pages
1. Automatically generate left and right page numbers and apply them to all pages.
2. Using page number styles and section prefixes
3. Automatically generate page numbers on both sides of a page
4 Create page titles quickly and easily using only master pages
5 Creating page headings using section markers
Follow the field practice
·Creating sensible page titles using master pages and section markers
Part 4
Differences with Photoshop and Illustrator
Working with graphics, colors, and tables in InDesign
01 Managing images in InDesign with excellent compatibility across Adobe programs
1 How to import an image and transform the frame
2 Apply import options according to image extension
3 Differences between importing and copying and pasting images
4 If the illustration image is not pasted, save and then import
5 Speed up your work by automatically fitting to the image frame
6 Understanding the warning signs and symbols in the Links panel
7 Editing the original image using the connection program
8 Wrapping text around a clipped image and a transparent background image
9 Create and redefine object styles to apply and modify effects at once
Follow the field practice
·Create a fixed object that moves with text using object styles
02 Editing vector images and handling objects
Create an object with 1 pass and wrap text around it
2 Adjusting stroke thickness when resizing an object
3. Drilling holes using the Pathfinder panel
4. Adding images to various objects using compound paths
5 Inserting an image into an object imported from Illustrator
6 Align objects and distribute them with precise spacing
Follow the field practice
·Creating a floral pattern or designing the top using the Pathfinder panel
03 Handling InDesign Colors Required in the Field
1. Create and apply primary and spot colors, and delete unused colors.
2 Edit the same color at once, save only the colors you need, and share them.
3. Create and apply new gradients and transparent gradients
4 Applying Color to Liven Up Black and White Images
5. When producing a black and white text using 1-color printing, be careful about black.
6. Creating and applying spot color mixed ink when producing with 2-color printing
7 Changing a manuscript produced with 2-color printing to 1-color printing
8 Convert spot colors to primary colors directly without modifying the original file
Follow the field practice
·Creating a six-color printing manuscript using four primary colors and two spot colors on the inside of a single volume
04 Create and edit tables in a stylish style
1 Convert text to a table at once and manage strokes and fills
2. Import tables from various programs and apply designs.
Split cells in 3 columns and rows and apply a fill
4 Connect the table to the next frame and repeat the header
5. Design by inserting images into tables and converting cells to graphic cells.
6. Set the alternating pattern in the table to improve readability.
7 Register and apply cell styles to modify them
Register and apply table styles to modify them.
Follow the field practice
·Apply cell style to the body and transform the shape of the header into an image
Part 5
InDesign's greatest strength is
Handling sophisticated typography
01 Understanding the Typography Environment
1 Import text into a document to create the body
2. Take full control of your manuscript using the story editor.
Add 3 glyph sets to quickly insert symbols and register special characters.
02 Adjusting the text frame in which the text flows
1. Flow text that is appropriate for the situation
2 Controlling the flow of text frames
3 Establishing the relationship between character ranges and paragraph ranges
4 Create layouts with different structures using text frame options
03 Easily edit text styles at once
1 Apply paragraph styles to the body of the text to improve readability.
Adding a character style to the body of text with a 2-paragraph style applied
3. Use nested styles to reduce hassle
4. Use GREP style to search and replace at once
Part 6
Printing and exporting output with the most errors
01 Final check before exporting for printing and output
1 Check Preflight to see errors in real time
2 Check for missing fonts
3 Check for lost or modified images
4 Checking Overprints and Knockouts
Reduce printing errors by checking the 5-minute preview and ink manager.
6. Check the trim settings considering the foundation
Follow the field practice
·Set multiple objects to overprint at once and check with the separation preview
02 Saving packages and exporting them to various file formats
1. Save the package that collects the files for printing.
2. Save the package by changing the missing font.
3. Save the package by changing missing or modified images.
4 Convert RGB images to CMYK and save the package
5 Export to PDF for printing
Export color documents to black and white PDF
7 Export as JPEG image
Design practice examples to follow
· Split large documents and export them as PDFs
03 Print for your desired purpose
Print by specifying a page range
2 Print in different sizes on paper
3. Print the booklet for binding
Follow the field practice
·Printing a large document into a booklet to fit A4 paper
Part 7
Post-processing that gives strength to the result
01 Types of post-processing experienced through touch
1 Post-processing that provides texture
2 Post-processing to provide a three-dimensional effect
02 Create and order a post-processing manuscript
1. Create a manuscript suitable for the selected post-processing
2. Required post-processing items that must be included in the print order form
Follow the field practice
·Making brochure covers using silver foil and epoxy
Preview
A Designer's Checklist to Prevent Printing Mistakes
Part 1
Before you start
01 Q&A to become an expert in editing and design
1. What is Practical Editorial Design? Practice and Theory
2 How is InDesign evolving? Beyond print and digital publishing.
3. Why don't the colors on my monitor and printed output match? InDesign's color modes.
4. Paper as a Transmission Medium: What Do You Need to Know? Print Quality by Paper Type
5. How to Finalize a Manuscript: Proper Printing Supervision and Manuscript Storage
6 Is this resolution enough for editing designs? Image resolution by purpose
02 A Look at Editing Design Practices
1 Active Magazine Editing
2 Interactive and Responsive Digital Publishing Editing
3 Editing a brochure with harmonious images and text
4 Editing leaflets in various folding forms
Editing a typography cover that makes five characters the main characters
6 Editing the company's annual report containing professional business information
7 Editing of various brand promotional materials that sensitively reflect trends
03 Colors you must know in the field
1. Using color information provided by Adobe
2 Differences between CMYK and spot colors in printing
3 Colors on different monitors and printed on paper from birth
04 A Guide to Free Fonts That Will Become a Treasure for Editorial Designers
1 Useful Body Fonts
2. Scope of use of free fonts
3. Troubleshooting Common Korean Font Issues in InDesign
Part 2
Create a new document and layout it
Managing files
01 Background information to know before deciding on a format
Difference between 1 page and spread
Why is the first page of a two-page panel odd?
3. Why are the left pages even and the right pages odd?
02 Format settings that vary depending on the binding method
1 Wireless binding is a multiple of 2, with pages facing each other
2 Create a separate cover file and calculate the spine size
3. Saddle stitch binding is a multiple of 4, with pages facing each other.
4. The folding format disables the page facing setting.
5 A plate format that utilizes a wide surface area by considering the 180° unfolding format
03 Planning a layout to enhance completeness
1 Create a stylish layout using margins and columns
2 Insert page numbers and titles considering the bottom margin
3. Consider the center margin area for wireless binding.
4. Using Margins and Grids to Determine the Completeness of a Book
5 Why Bleeds Are Important in InDesign
Part 3
Edit multiple pages at once
Page management that enables
01 Managing pages that show one book at a time
1 Change your start page to manage files efficiently.
2 Inserting pages of different formats within a document
3 Collaborating using the Library panel
4 Positioning the graphic source to follow the text
Follow the field practice
·Create book files for easy management
02 Using Master Pages
1 Changing styles on the master page
2. Disable master page application for some pages only
3. Creating and applying multiple master pages in the same document
4. Importing and applying a master page from another document
5. Make the page you are working on a master page to automatically insert page numbers.
6 Modifying Master Items Using Master Page Overrides
7 Adjusting Master Page Numbers Hidden by Objects
Follow the field practice
· Quickly create catalogs using layers and master page overrides.
03 Creating various page numbers and titles using master pages
1. Automatically generate left and right page numbers and apply them to all pages.
2. Using page number styles and section prefixes
3. Automatically generate page numbers on both sides of a page
4 Create page titles quickly and easily using only master pages
5 Creating page headings using section markers
Follow the field practice
·Creating sensible page titles using master pages and section markers
Part 4
Differences with Photoshop and Illustrator
Working with graphics, colors, and tables in InDesign
01 Managing images in InDesign with excellent compatibility across Adobe programs
1 How to import an image and transform the frame
2 Apply import options according to image extension
3 Differences between importing and copying and pasting images
4 If the illustration image is not pasted, save and then import
5 Speed up your work by automatically fitting to the image frame
6 Understanding the warning signs and symbols in the Links panel
7 Editing the original image using the connection program
8 Wrapping text around a clipped image and a transparent background image
9 Create and redefine object styles to apply and modify effects at once
Follow the field practice
·Create a fixed object that moves with text using object styles
02 Editing vector images and handling objects
Create an object with 1 pass and wrap text around it
2 Adjusting stroke thickness when resizing an object
3. Drilling holes using the Pathfinder panel
4. Adding images to various objects using compound paths
5 Inserting an image into an object imported from Illustrator
6 Align objects and distribute them with precise spacing
Follow the field practice
·Creating a floral pattern or designing the top using the Pathfinder panel
03 Handling InDesign Colors Required in the Field
1. Create and apply primary and spot colors, and delete unused colors.
2 Edit the same color at once, save only the colors you need, and share them.
3. Create and apply new gradients and transparent gradients
4 Applying Color to Liven Up Black and White Images
5. When producing a black and white text using 1-color printing, be careful about black.
6. Creating and applying spot color mixed ink when producing with 2-color printing
7 Changing a manuscript produced with 2-color printing to 1-color printing
8 Convert spot colors to primary colors directly without modifying the original file
Follow the field practice
·Creating a six-color printing manuscript using four primary colors and two spot colors on the inside of a single volume
04 Create and edit tables in a stylish style
1 Convert text to a table at once and manage strokes and fills
2. Import tables from various programs and apply designs.
Split cells in 3 columns and rows and apply a fill
4 Connect the table to the next frame and repeat the header
5. Design by inserting images into tables and converting cells to graphic cells.
6. Set the alternating pattern in the table to improve readability.
7 Register and apply cell styles to modify them
Register and apply table styles to modify them.
Follow the field practice
·Apply cell style to the body and transform the shape of the header into an image
Part 5
InDesign's greatest strength is
Handling sophisticated typography
01 Understanding the Typography Environment
1 Import text into a document to create the body
2. Take full control of your manuscript using the story editor.
Add 3 glyph sets to quickly insert symbols and register special characters.
02 Adjusting the text frame in which the text flows
1. Flow text that is appropriate for the situation
2 Controlling the flow of text frames
3 Establishing the relationship between character ranges and paragraph ranges
4 Create layouts with different structures using text frame options
03 Easily edit text styles at once
1 Apply paragraph styles to the body of the text to improve readability.
Adding a character style to the body of text with a 2-paragraph style applied
3. Use nested styles to reduce hassle
4. Use GREP style to search and replace at once
Part 6
Printing and exporting output with the most errors
01 Final check before exporting for printing and output
1 Check Preflight to see errors in real time
2 Check for missing fonts
3 Check for lost or modified images
4 Checking Overprints and Knockouts
Reduce printing errors by checking the 5-minute preview and ink manager.
6. Check the trim settings considering the foundation
Follow the field practice
·Set multiple objects to overprint at once and check with the separation preview
02 Saving packages and exporting them to various file formats
1. Save the package that collects the files for printing.
2. Save the package by changing the missing font.
3. Save the package by changing missing or modified images.
4 Convert RGB images to CMYK and save the package
5 Export to PDF for printing
Export color documents to black and white PDF
7 Export as JPEG image
Design practice examples to follow
· Split large documents and export them as PDFs
03 Print for your desired purpose
Print by specifying a page range
2 Print in different sizes on paper
3. Print the booklet for binding
Follow the field practice
·Printing a large document into a booklet to fit A4 paper
Part 7
Post-processing that gives strength to the result
01 Types of post-processing experienced through touch
1 Post-processing that provides texture
2 Post-processing to provide a three-dimensional effect
02 Create and order a post-processing manuscript
1. Create a manuscript suitable for the selected post-processing
2. Required post-processing items that must be included in the print order form
Follow the field practice
·Making brochure covers using silver foil and epoxy
Detailed image
Publisher's Review
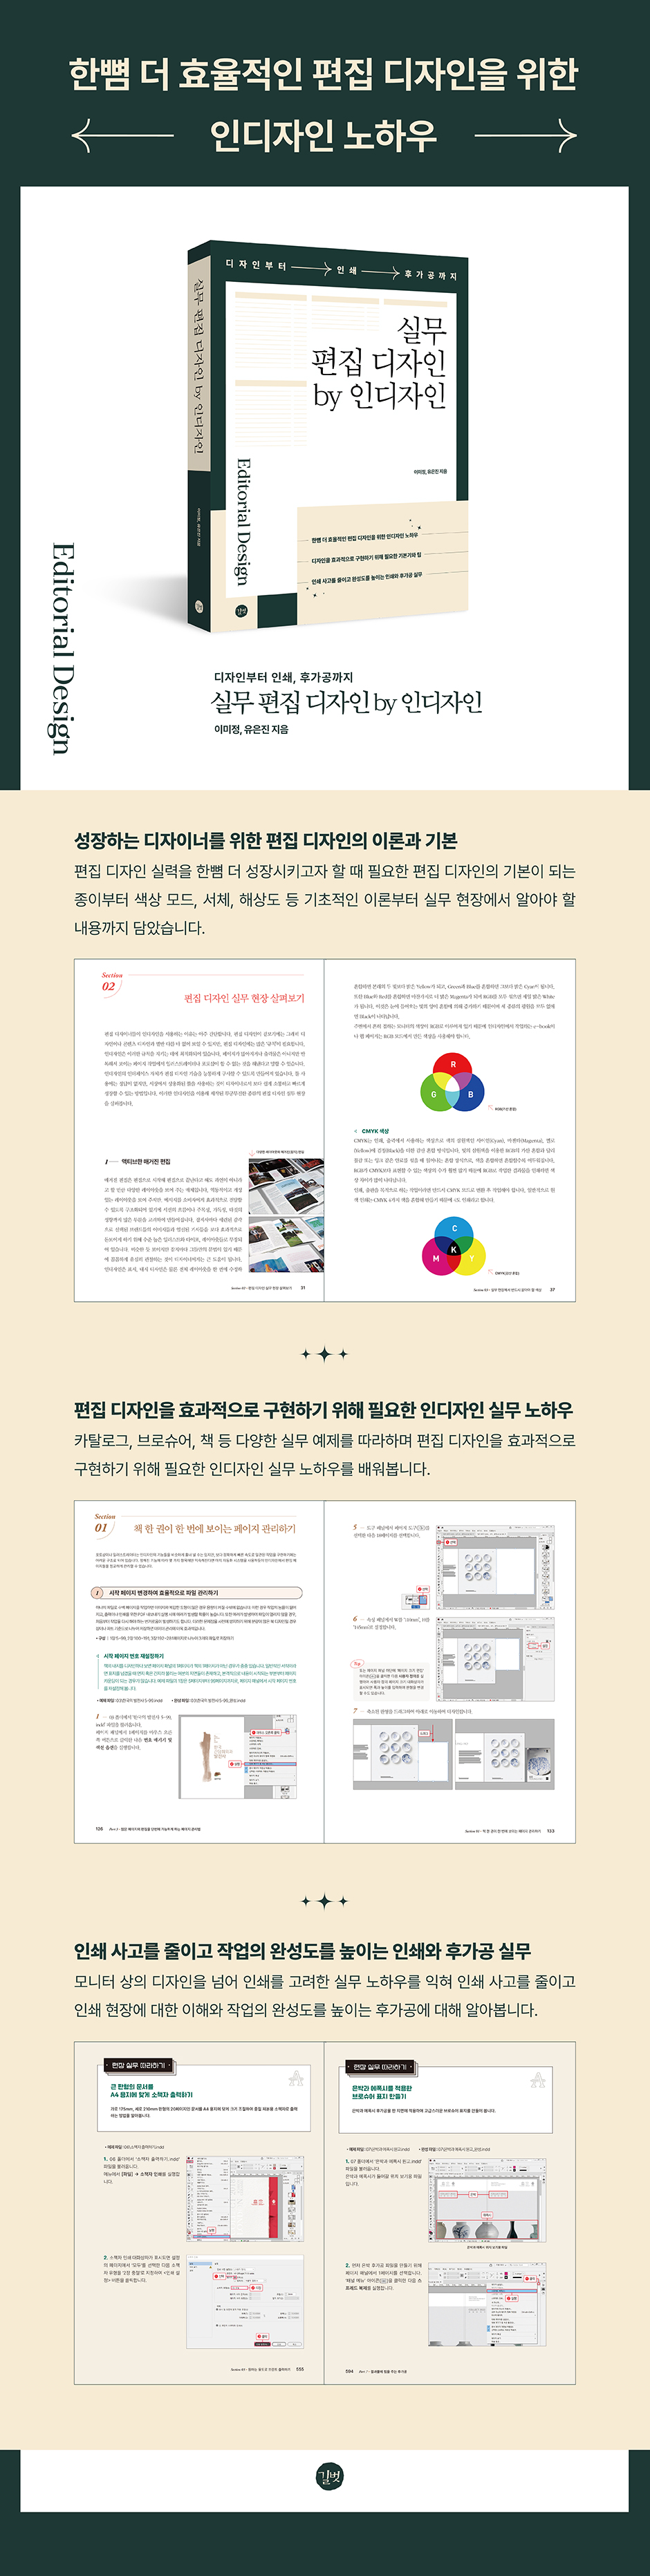
Theory and Practice of Editorial Design for Growing Designers
This book contains practical InDesign know-how for new and junior designers who can use InDesign but still have difficulty using it effectively for work.
It easily explains the meaning and use of color modes, page composition control and extended application, margins and grid systems, etc., which are the most important but always a concern in editorial design.
On-site printing and post-processing practices that enhance the quality of work
This book covers everything from the minimal terminology required to understand the printing field, storage methods and binding processes that take printing into account, to post-processing and the trial and errors that arise when communication is lacking, as well as in-depth learning. It will help you build a solid foundation and solidify your practical know-how to become a professional designer.
The ability to predict how everything imagined on the computer can be realized on site and improve its completion is the ability to successfully lead a project.
This book contains practical InDesign know-how for new and junior designers who can use InDesign but still have difficulty using it effectively for work.
It easily explains the meaning and use of color modes, page composition control and extended application, margins and grid systems, etc., which are the most important but always a concern in editorial design.
On-site printing and post-processing practices that enhance the quality of work
This book covers everything from the minimal terminology required to understand the printing field, storage methods and binding processes that take printing into account, to post-processing and the trial and errors that arise when communication is lacking, as well as in-depth learning. It will help you build a solid foundation and solidify your practical know-how to become a professional designer.
The ability to predict how everything imagined on the computer can be realized on site and improve its completion is the ability to successfully lead a project.
GOODS SPECIFICS
- Date of issue: August 31, 2022
- Page count, weight, size: 600 pages | 1,410g | 188*257*25mm
- ISBN13: 9791140701117
- ISBN10: 1140701118
You may also like
카테고리
korean


korean

![GQ KOREA Mark (Monthly): December [2025]](http://librairie.coreenne.fr/cdn/shop/files/8ef265dbbfbf186523ed75ba7319009d.jpg?v=1765340328&width=3840)


