

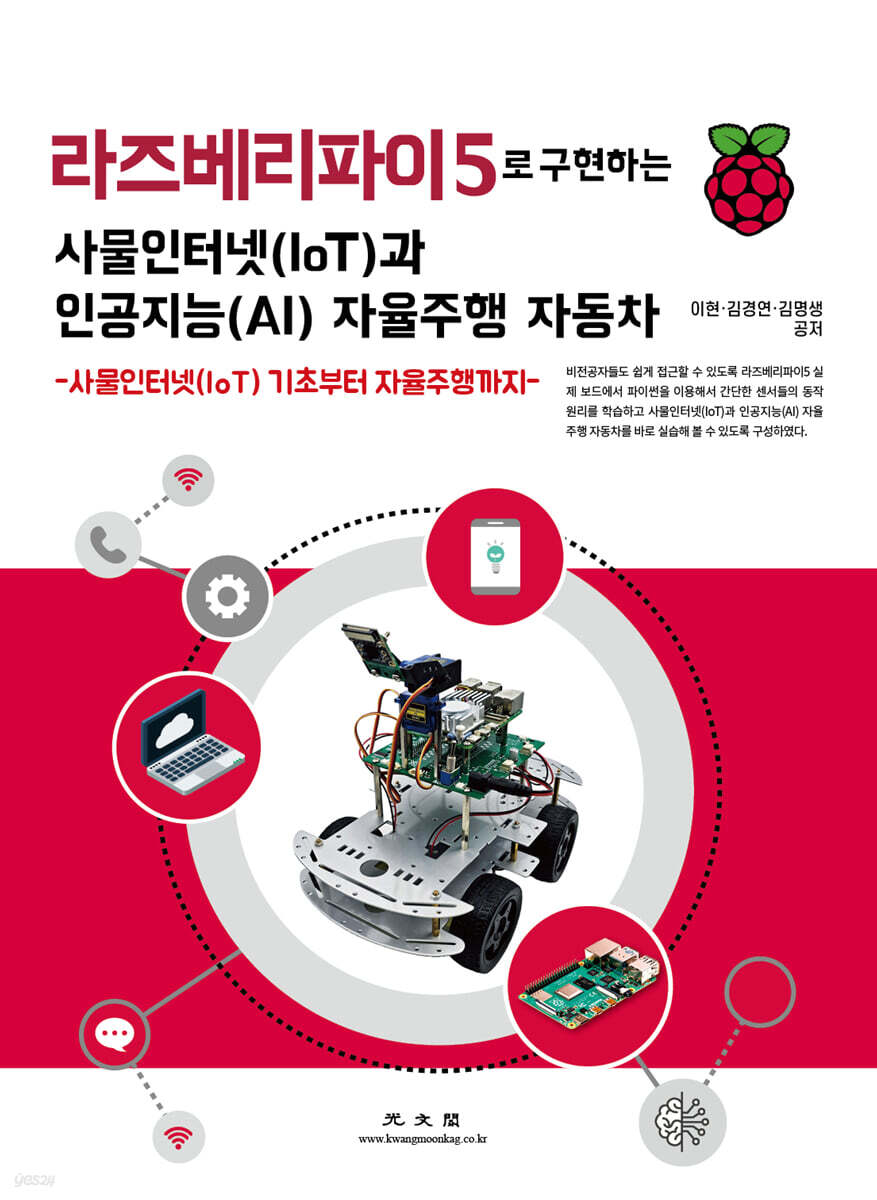
Internet of Things (IoT) and AI-powered autonomous vehicles implemented with the Raspberry Pi 5
 |
Description
Book Introduction
This textbook is a follow-up to “Implementing the Internet of Things (IoT) and Artificial Intelligence (AI) with Raspberry Pi 4.” Just like the previous textbook, it allows you to practice right away by simply connecting the Raspberry Pi Sensor HAT board without using a breadboard or jumper wires to make wiring complex components easier when practicing sensors, so even non-electronic engineering experts can easily follow along.
For Raspberry Pi 4 users, the power supply method (5A@5V) and the operating system installation method that have changed in Raspberry Pi 5 have been explained, and unlike previous textbooks, Linux commands and basic Python grammar have been boldly omitted, focusing on basic sensor usage for implementing the Internet of Things on Raspberry Pi 5, Bluetooth communication, and database and web service implementation for IoT service implementation.
For Raspberry Pi 4 users, the power supply method (5A@5V) and the operating system installation method that have changed in Raspberry Pi 5 have been explained, and unlike previous textbooks, Linux commands and basic Python grammar have been boldly omitted, focusing on basic sensor usage for implementing the Internet of Things on Raspberry Pi 5, Bluetooth communication, and database and web service implementation for IoT service implementation.
index
1.
Introduction and Getting Started with the Raspberry Pi 5
1.1 Introduction to the Raspberry Pi 5
1.2 Installing Raspbian OS
(1) Micro SD memory format
(2) Raspbian OS installation
1.3 Raspberry Pi Environment Settings
(1) Finding the Raspberry Pi IP
1.4 Connecting to the network
(1) Using SSH
(2) Using VNC
(3) Setting up an FTP server
1.5 Finishing the Raspberry Pi setup
(1) Locale, Timezone, Keyboard settings
(2) Raspberry Pi WiFi settings
(3) Raspberry Pi Update
(4) Install Korean font and input device (IBUS)
2.
Raspberry Pi Python
2.1 Python Overview
2.2 Getting Started with Python
(1) Running the Python development environment (IDE)
(2) Writing Python code
(3) Running Python code in an IDE environment
(4) Running Python code at the shell prompt
2.3 Choosing a Python Version for AI
(1) Install pyenv
(2) Install a new Python version with pyenv
2.4 Setting up a Python virtual environment
(1) Creating a Python virtual environment
(2) Activate Python virtual environment
(3) Terminate the Python virtual environment
(4) Delete Python virtual environment
2.5 Setting up the Thonny Python virtual environment
(1) Switch to regular mode
(2) Selecting a Python interpreter
2.6 Install TensorFlow for your Python version
(1) Install Python 3.11.2 + Tensorflow 2.19
(2) Example of installing different versions of Tensorflow
3.
Raspberry Pi GPIO
3.1 Basic concepts and structure of GPIO
(1) Definition and characteristics of GPIO
(2) Raspberry Pi 5 GPIO pin layout
3.2 GPIO LED Control
(1) Understanding LED control
(2) GPIO programming practice
3.3 GPIO button input and LED output practice
3.4 GPIO Application Cases and Real-Life Applications
3.5 Ultrasonic sensor (HC-SR04)
(1) Principle of ultrasonic sensor (HC-SR04)
(2) Ultrasonic sensor practice
3.6 PWM(Pulse Width Modulation)
(1) PWM theory and LED control practice
3.7 PWM Buzzer Practice
(1) Buzzer
(2) TonalBuzzer and scales
3.8 PWM servo motor control
(1) Servo motor control principle
3.9 UART (Universal Asynchronous Receiver-Transmitter) communication
(1) Serial communication overview
(2) UART communication structure
(3) Raspberry Pi 5 serial device
(4) Raspberry Pi 5 UART communication practice
3.10 UART Communication LED Control
4.
Bluetooth Communication
4.1 Bluetooth Communication
(1) Bluetooth communication overview
(2) Connecting the Bluetooth module
4.2 Bluetooth Communication Practice
(1) Bluetooth practice
5. SPI communication (Serial Peripheral Interface)
5.1 SPI Communication Overview
5.2 Comparison of Synchronous and Asynchronous Communication Methods
5.3 Signal lines and operating principles of SPI communication
5.4 MCP3008 ADC Chip
(1) Analog and digital signals
(2) ADC (Analog to Digital Converter) conversion principle
(3) MCP3008 circuit connection
5.5 SPI variable resistor input practice
(1) Variable resistor input
(2) Wiring diagram
(3) How to assign pins to SPI devices in the gpiozero library
(4) Practice code examples and explanations
5.6 LM35 temperature sensor
(1) Activate SPI communication
(2) Install the spidev library
6.
Camera Utilization
6.1 Raspberry Pi 5 Camera
(1) Activate the camera interface
(2) Camera operation test
6.2 Using picamera2
7.
Utilizing OpenCV
7.1 Installing OpenCV
(1) Installing OpenCV 4.x on Raspberry Pi
7.2 Basic Use of OpenCV
(1) Displaying images
(2) Change grayscale
7.3 Using the OpenCV Camera
(1) OpenCV Camera Preview
(2) Saving OpenCV camera photos
7.4 Artificial Intelligence Facial and Eye Recognition
7.5 OpenCV Motion Recognition Intrusion Detection Function
8.
IoT service using Flask web server
8.1 Web Server Role
8.2 Flask Web Server
(1) Installing the Flask web server
(2) Flask test
(3) How to add a web page
(4) Creating an HTML page
8.3 GET, POST requests
(1) GET method parameters
(2) POST method parameters
8.4 Web GPIO Control
9.
MariaDB database
9.1 MariaDB
(1) Install MariaDB
(2) Setting up the root account
(3) Setting DB user permissions
9.2 Connecting to HeidiSQL
(1) Setting to allow external access
(2) Install heidiSQL
9.3 Creating a Table
(1) Create a temperature table
(2) Create user_info table
9.4 Database Queries
(1) INSERT statement
(2) SELECT statement
(3) UPDATE statement
(4) DELETE statement
9.5 Web Temperature Service
(1) Install mysql-connector
(2) mysql-connector test
(3) Temperature sensor data DB storage
(4) Temperature sensor data web service
(5) Temperature sensor data web service - Added date search
9.6 Drawing Flask Graphs (Chart.js)
(1) Using Chart.js
(2) Chart.js graph example
(3) Draw a temperature change line graph
10.
Controlling a Car with Python
10.1 Assembling a Self-Driving Car
(1) Raspberry Pi 5 AI autonomous vehicle PiCar-R5 components
(2) PiCar-R5 assembly
10.2 Turning on the autonomous vehicle
10.3 Autonomous Vehicle Control Board LED Control
10.4 Controlling LEDs using the Keyboard
10.5 DC Motor Control
(1) Structure of DC motor
(2) DC motor direction control
(3) DC motor speed control
10.6 Moving the car forward, backward, and turning
10.7 I2C Communication
(1) I2C communication structure
(2) I2C communication method
(3) I2C communication read and write
10.8 PCA9685 Servo Motor Control
(1) PCA9685
(2) Activate Raspberry Pi I2C
(3) Installing the PCA9685 library
(4) SG90 servo motor control
10.9 WS2812 RGB LED control
(1) Install WS2812 RGB LED control library
11.
Control your car with a web interface
11.1 Web Remote Control CCTV
11.2 OpenCV Motion Recognition Streaming
12.
Implementation of self-driving cars
12.1 Data Storage for Autonomous Driving Model Training
(1) car_control.py execution structure
(2) Remote control of a car in an environment without a wireless router
(3) car_control.html button function
12.2 Loading Data for Autonomous Driving Model Training
12.3 Classifying Autonomous Driving Model Training Data
12.4 Convolutional Neural Networks (CNNs)
(1) Convolutional Neural Network (CNN) Structure
(2) Convolutional Neural Network: Padding
(3) Convolutional Neural Network: Stride
(4) Activation function: Relu
(5) Convolutional Neural Network: MaxPooling Layer
(6) Convolutional Neural Network: Dropout Layer
(7) Convolutional Neural Network: Flatten Layer
12.5 Training a Machine Learning CNN Model
(1) Analysis of convolutional neural network code
12.6 How to Train a Machine Learning CNN Model on a PC
(1) Moving data to be learned
(2) Install Python and Tensorflow on your PC
12.7 Validating Model Data
12.8 Artificial Intelligence Autonomous Driving Practice
13. YOLO v11 Object detection
13.1 Installing YOLO v11
13.2 YOLO v11 Test
(1) Check the pre-trained YOLO model information
(2) YOLO object recognition test
13.3 NCNN (Neural Network Computing Framework) Model
13.4 YOLO v11 Custom Data Training
(1) Obtaining custom data related to YOLO traffic
(2) YOLO learning data structure
(3) Learning YOLO custom data
13.5 Applying YOLO Custom Learning Models to Autonomous Vehicles
Appendix
Introduction and Getting Started with the Raspberry Pi 5
1.1 Introduction to the Raspberry Pi 5
1.2 Installing Raspbian OS
(1) Micro SD memory format
(2) Raspbian OS installation
1.3 Raspberry Pi Environment Settings
(1) Finding the Raspberry Pi IP
1.4 Connecting to the network
(1) Using SSH
(2) Using VNC
(3) Setting up an FTP server
1.5 Finishing the Raspberry Pi setup
(1) Locale, Timezone, Keyboard settings
(2) Raspberry Pi WiFi settings
(3) Raspberry Pi Update
(4) Install Korean font and input device (IBUS)
2.
Raspberry Pi Python
2.1 Python Overview
2.2 Getting Started with Python
(1) Running the Python development environment (IDE)
(2) Writing Python code
(3) Running Python code in an IDE environment
(4) Running Python code at the shell prompt
2.3 Choosing a Python Version for AI
(1) Install pyenv
(2) Install a new Python version with pyenv
2.4 Setting up a Python virtual environment
(1) Creating a Python virtual environment
(2) Activate Python virtual environment
(3) Terminate the Python virtual environment
(4) Delete Python virtual environment
2.5 Setting up the Thonny Python virtual environment
(1) Switch to regular mode
(2) Selecting a Python interpreter
2.6 Install TensorFlow for your Python version
(1) Install Python 3.11.2 + Tensorflow 2.19
(2) Example of installing different versions of Tensorflow
3.
Raspberry Pi GPIO
3.1 Basic concepts and structure of GPIO
(1) Definition and characteristics of GPIO
(2) Raspberry Pi 5 GPIO pin layout
3.2 GPIO LED Control
(1) Understanding LED control
(2) GPIO programming practice
3.3 GPIO button input and LED output practice
3.4 GPIO Application Cases and Real-Life Applications
3.5 Ultrasonic sensor (HC-SR04)
(1) Principle of ultrasonic sensor (HC-SR04)
(2) Ultrasonic sensor practice
3.6 PWM(Pulse Width Modulation)
(1) PWM theory and LED control practice
3.7 PWM Buzzer Practice
(1) Buzzer
(2) TonalBuzzer and scales
3.8 PWM servo motor control
(1) Servo motor control principle
3.9 UART (Universal Asynchronous Receiver-Transmitter) communication
(1) Serial communication overview
(2) UART communication structure
(3) Raspberry Pi 5 serial device
(4) Raspberry Pi 5 UART communication practice
3.10 UART Communication LED Control
4.
Bluetooth Communication
4.1 Bluetooth Communication
(1) Bluetooth communication overview
(2) Connecting the Bluetooth module
4.2 Bluetooth Communication Practice
(1) Bluetooth practice
5. SPI communication (Serial Peripheral Interface)
5.1 SPI Communication Overview
5.2 Comparison of Synchronous and Asynchronous Communication Methods
5.3 Signal lines and operating principles of SPI communication
5.4 MCP3008 ADC Chip
(1) Analog and digital signals
(2) ADC (Analog to Digital Converter) conversion principle
(3) MCP3008 circuit connection
5.5 SPI variable resistor input practice
(1) Variable resistor input
(2) Wiring diagram
(3) How to assign pins to SPI devices in the gpiozero library
(4) Practice code examples and explanations
5.6 LM35 temperature sensor
(1) Activate SPI communication
(2) Install the spidev library
6.
Camera Utilization
6.1 Raspberry Pi 5 Camera
(1) Activate the camera interface
(2) Camera operation test
6.2 Using picamera2
7.
Utilizing OpenCV
7.1 Installing OpenCV
(1) Installing OpenCV 4.x on Raspberry Pi
7.2 Basic Use of OpenCV
(1) Displaying images
(2) Change grayscale
7.3 Using the OpenCV Camera
(1) OpenCV Camera Preview
(2) Saving OpenCV camera photos
7.4 Artificial Intelligence Facial and Eye Recognition
7.5 OpenCV Motion Recognition Intrusion Detection Function
8.
IoT service using Flask web server
8.1 Web Server Role
8.2 Flask Web Server
(1) Installing the Flask web server
(2) Flask test
(3) How to add a web page
(4) Creating an HTML page
8.3 GET, POST requests
(1) GET method parameters
(2) POST method parameters
8.4 Web GPIO Control
9.
MariaDB database
9.1 MariaDB
(1) Install MariaDB
(2) Setting up the root account
(3) Setting DB user permissions
9.2 Connecting to HeidiSQL
(1) Setting to allow external access
(2) Install heidiSQL
9.3 Creating a Table
(1) Create a temperature table
(2) Create user_info table
9.4 Database Queries
(1) INSERT statement
(2) SELECT statement
(3) UPDATE statement
(4) DELETE statement
9.5 Web Temperature Service
(1) Install mysql-connector
(2) mysql-connector test
(3) Temperature sensor data DB storage
(4) Temperature sensor data web service
(5) Temperature sensor data web service - Added date search
9.6 Drawing Flask Graphs (Chart.js)
(1) Using Chart.js
(2) Chart.js graph example
(3) Draw a temperature change line graph
10.
Controlling a Car with Python
10.1 Assembling a Self-Driving Car
(1) Raspberry Pi 5 AI autonomous vehicle PiCar-R5 components
(2) PiCar-R5 assembly
10.2 Turning on the autonomous vehicle
10.3 Autonomous Vehicle Control Board LED Control
10.4 Controlling LEDs using the Keyboard
10.5 DC Motor Control
(1) Structure of DC motor
(2) DC motor direction control
(3) DC motor speed control
10.6 Moving the car forward, backward, and turning
10.7 I2C Communication
(1) I2C communication structure
(2) I2C communication method
(3) I2C communication read and write
10.8 PCA9685 Servo Motor Control
(1) PCA9685
(2) Activate Raspberry Pi I2C
(3) Installing the PCA9685 library
(4) SG90 servo motor control
10.9 WS2812 RGB LED control
(1) Install WS2812 RGB LED control library
11.
Control your car with a web interface
11.1 Web Remote Control CCTV
11.2 OpenCV Motion Recognition Streaming
12.
Implementation of self-driving cars
12.1 Data Storage for Autonomous Driving Model Training
(1) car_control.py execution structure
(2) Remote control of a car in an environment without a wireless router
(3) car_control.html button function
12.2 Loading Data for Autonomous Driving Model Training
12.3 Classifying Autonomous Driving Model Training Data
12.4 Convolutional Neural Networks (CNNs)
(1) Convolutional Neural Network (CNN) Structure
(2) Convolutional Neural Network: Padding
(3) Convolutional Neural Network: Stride
(4) Activation function: Relu
(5) Convolutional Neural Network: MaxPooling Layer
(6) Convolutional Neural Network: Dropout Layer
(7) Convolutional Neural Network: Flatten Layer
12.5 Training a Machine Learning CNN Model
(1) Analysis of convolutional neural network code
12.6 How to Train a Machine Learning CNN Model on a PC
(1) Moving data to be learned
(2) Install Python and Tensorflow on your PC
12.7 Validating Model Data
12.8 Artificial Intelligence Autonomous Driving Practice
13. YOLO v11 Object detection
13.1 Installing YOLO v11
13.2 YOLO v11 Test
(1) Check the pre-trained YOLO model information
(2) YOLO object recognition test
13.3 NCNN (Neural Network Computing Framework) Model
13.4 YOLO v11 Custom Data Training
(1) Obtaining custom data related to YOLO traffic
(2) YOLO learning data structure
(3) Learning YOLO custom data
13.5 Applying YOLO Custom Learning Models to Autonomous Vehicles
Appendix
Publisher's Review
This textbook is a follow-up to “Implementing the Internet of Things (IoT) and Artificial Intelligence (AI) with Raspberry Pi 4.” Just like the previous textbook, it allows you to practice right away by simply connecting the Raspberry Pi Sensor HAT board without using a breadboard or jumper wires to make wiring complex components easier when practicing sensors, so even non-electronic engineering experts can easily follow along.
For Raspberry Pi 4 users, the power supply method (5A@5V) and the operating system installation method that have changed in Raspberry Pi 5 have been explained, and unlike previous textbooks, Linux commands and basic Python grammar have been boldly omitted, focusing on basic sensor usage for implementing the Internet of Things on Raspberry Pi 5, Bluetooth communication, and database and web service implementation for IoT service implementation.
If you need to learn Linux commands and Python syntax first, we recommend starting with the textbook “Implementing the Internet of Things (IoT) and Artificial Intelligence (AI) with Raspberry Pi 4.”
In the latter part of the textbook, a self-driving car was implemented using a convolutional neural network (CNN), and the open source model “donkey car (https://docs.donkeycar.com)”, which has gained many users around the world, was heavily referenced.
Tensorflow 2.x version is widely used as an artificial intelligence development environment in the Raspberry Pi 5 environment, but the installation method is a bit complicated depending on the Python and Numpy versions.
This book explains in detail and in a very friendly manner how to set up a Python virtual environment and how to install TensorFlow, especially the operating principles of convolutional neural networks (CNNs). You can also learn how to collect data required for training a convolutional neural network (CNN) using OpenCV, how to train the collected data on a Raspberry Pi 5, and how to transfer training data saved on a Raspberry Pi 5 to a PC for efficient training.
In the last chapter, we will learn how to install the YOLO v11 Object detection model and train the custom data for YOLO v11 to apply it to self-driving cars. If you complete the learning process, you will not only understand the basics of self-driving cars based on the knowledge you have learned through this textbook, but you will also be able to apply and apply it to other industries that utilize convolutional neural networks (CNN) and object detection models.
- All authors -
For Raspberry Pi 4 users, the power supply method (5A@5V) and the operating system installation method that have changed in Raspberry Pi 5 have been explained, and unlike previous textbooks, Linux commands and basic Python grammar have been boldly omitted, focusing on basic sensor usage for implementing the Internet of Things on Raspberry Pi 5, Bluetooth communication, and database and web service implementation for IoT service implementation.
If you need to learn Linux commands and Python syntax first, we recommend starting with the textbook “Implementing the Internet of Things (IoT) and Artificial Intelligence (AI) with Raspberry Pi 4.”
In the latter part of the textbook, a self-driving car was implemented using a convolutional neural network (CNN), and the open source model “donkey car (https://docs.donkeycar.com)”, which has gained many users around the world, was heavily referenced.
Tensorflow 2.x version is widely used as an artificial intelligence development environment in the Raspberry Pi 5 environment, but the installation method is a bit complicated depending on the Python and Numpy versions.
This book explains in detail and in a very friendly manner how to set up a Python virtual environment and how to install TensorFlow, especially the operating principles of convolutional neural networks (CNNs). You can also learn how to collect data required for training a convolutional neural network (CNN) using OpenCV, how to train the collected data on a Raspberry Pi 5, and how to transfer training data saved on a Raspberry Pi 5 to a PC for efficient training.
In the last chapter, we will learn how to install the YOLO v11 Object detection model and train the custom data for YOLO v11 to apply it to self-driving cars. If you complete the learning process, you will not only understand the basics of self-driving cars based on the knowledge you have learned through this textbook, but you will also be able to apply and apply it to other industries that utilize convolutional neural networks (CNN) and object detection models.
- All authors -
GOODS SPECIFICS
- Date of issue: August 20, 2025
- Page count, weight, size: 368 pages | 810g | 188*257*16mm
- ISBN13: 9791193965184
- ISBN10: 1193965187
You may also like
카테고리
korean


korean

![GQ KOREA Mark (Monthly): December [2025]](http://librairie.coreenne.fr/cdn/shop/files/8ef265dbbfbf186523ed75ba7319009d.jpg?v=1765340328&width=3840)


