

Photo PHOTOGRAPHY
 |
Description
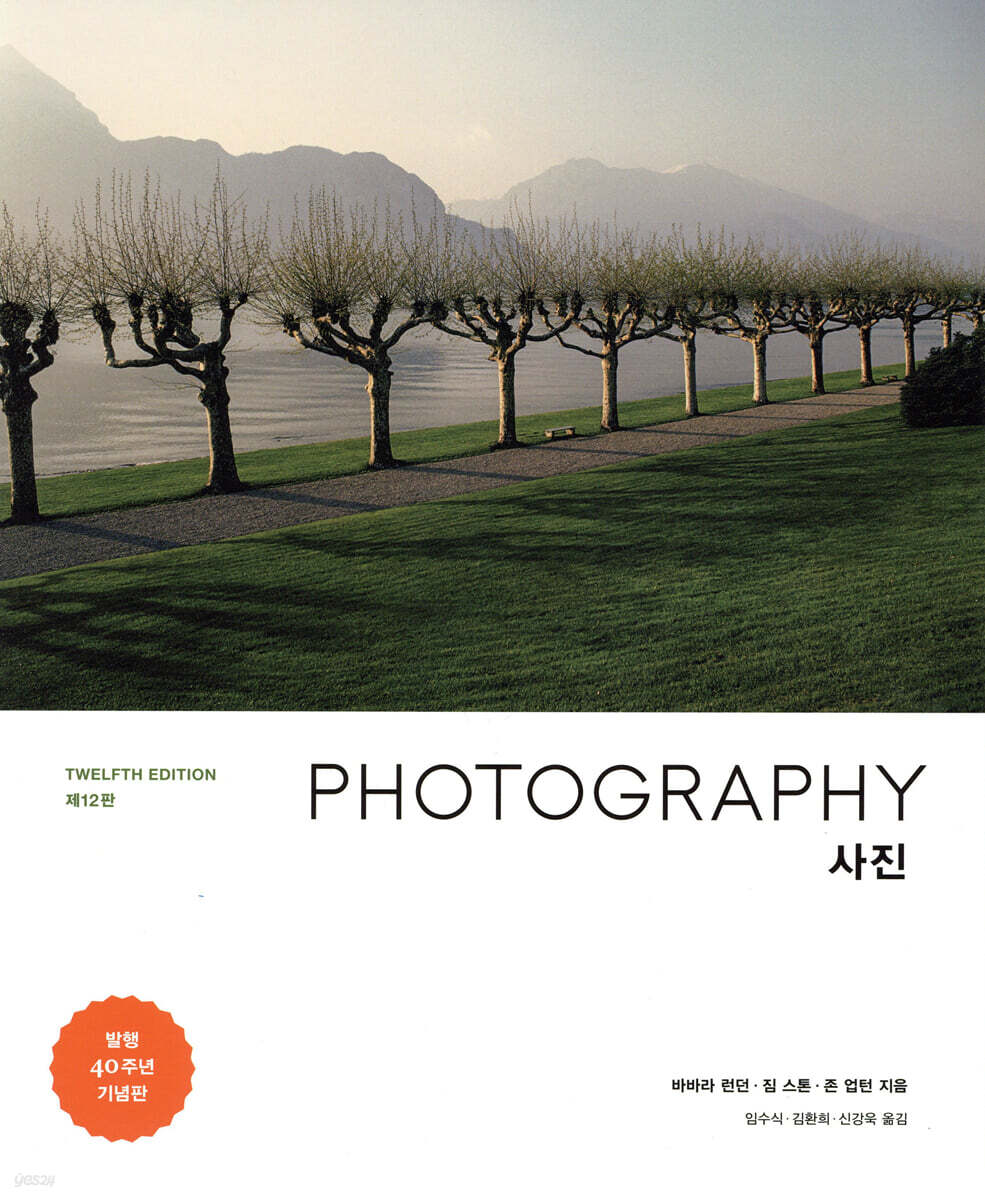
Book Introduction
Since its debut in 1976, 『Photo』 has delighted millions of readers worldwide and has been updated to keep pace with changes from film to digital, manual to automatic, and black-and-white to color.
This 12th edition, commemorating the 40th anniversary of publication, introduces the use of the latest software for digital work and, in response to the current demand to re-examine the value of analog work such as film, manual, and black-and-white photography, provides guidance on how to use a view camera, film developing and darkroom printing methods, equipment information, and safety rules.
In addition, we have added resources such as operating tips for the latest cameras, how to use useful software such as Capture One Pro and Lightroom CC, new contemporary artists and works, additional explanations of existing topics, and more diverse problem-solving methods, making it a total of 420 pages.
This is an essential guidebook that explains everything from how to hold a camera to shooting, developing or printing, displaying, and preserving.
This 12th edition, commemorating the 40th anniversary of publication, introduces the use of the latest software for digital work and, in response to the current demand to re-examine the value of analog work such as film, manual, and black-and-white photography, provides guidance on how to use a view camera, film developing and darkroom printing methods, equipment information, and safety rules.
In addition, we have added resources such as operating tips for the latest cameras, how to use useful software such as Capture One Pro and Lightroom CC, new contemporary artists and works, additional explanations of existing topics, and more diverse problem-solving methods, making it a total of 420 pages.
This is an essential guidebook that explains everything from how to hold a camera to shooting, developing or printing, displaying, and preserving.
index
preface
Chapter 1.
Getting started
Knowing Your Camera │ Preparing Your Camera │ Focusing and Exposure │ Taking Photos │ What to Shoot… A Basic Guide Before You Begin │ Portrait Photography │ Landscape Photography
Chapter 2.
camera
Camera Basics │ Shutter… Shutter and Light │ Shutter and Movement │ Freezing Movement into Pictures │ Aperture… Aperture and Light │ Aperture and Depth of Field │ Using Shutter and Aperture Together │ Choosing a Camera… Digital Cameras │ Film Cameras │ How to Hold Your Camera Steadily │ Photographer on the Scene, Photojournalist, Lindsey Addario
Chapter 3.
lens
From pinhole to lens │ Focal length of lenses… Standard lens │ Long focus lens │ Prime focus lens │ Zoom lens │ Special purpose lens │ Focusing… Manual focus │ Auto focus │ Focus and depth of field… Depth of field control │ Zone focusing │ Focusing at hyperfocal distance │ Perspective │ Lens buying tips │ How to get the most out of your camera and lenses │ Photographer in the field Art photographer, Alec Soth
Chapter 4.
Exposure, Sensor, and Film
Exposure Basics… Equivalent Exposure │ How Exposure Meters Work │ Built-in Camera Exposure Meters │ Automatic Exposure │ Exposure Metering Methods… Exposure Metering for Average-Tone Scenes │ How to Use Different Types of Exposure Meters │ Exposure Metering for High-Contrast Scenes │ Specific-Tone Exposure and Bracketing │ Scenes Where Exposure Metering is Difficult │ Histograms… Measurement in Digital Photography │ Three Histograms for Color Photography │ Exposure Latitude and Dynamic Range… How Much Can Exposure Vary? │ Photosensitive Materials… Grain and Pixels │ Choosing and Using Film │ Film and Sensor Sensitivity… Sensitivity and ISO │ Grain and Noise │ Using Filters │ Beyond Visible Light… Infrared Photography │ Exposure Utilization │ Photographer on the Scene, Advertising Photographer, Clint Clemens
Chapter 5.
Light and color
Additive and Subtractive Color │ Color Photography: The Three Image Layers │ The Characteristics of Color │ Color Balance… Color Changes Over Time │ Color Temperature │ Color Cast │ Mixed Lighting │ Color Modes and Color Gamut │ Color Management │ Color Adjustment on Film… Color Balance Filters │ Photographers on the Field Behind the Scenes of Sports, Walter Eus Jr.
Chapter 6.
Developing film
Developing Black and White Roll Film... Tools and Materials Needed for Developing | Types of Chemicals and How to Handle Them | Chemical Safety Precautions | Step-by-Step Guide to Developing Black and White Roll Film | How the Film Development Process Affects Your Photos | Exposure and Developing: Underexposure, Overexposure, and Overexposure
Chapter 7.
Developing in a darkroom
Black and White Printing… Printing Equipment and Materials │ Enlargers │ Photographic Paper │ A Step-by-Step Guide to Black and White Printing… Contact Prints: Seeing an Entire Roll of Film at Once │ Preparing for an Enlarged Print │ Test Strips │ Finished Prints after a Test Print │ The Black and White Printing Process │ Checking the Density and Contrast of a Printed Photograph │ Adjusting the Contrast… Graded and Multi-Tone Paper │ Dodging and Burning │ Spotting to Remove Small Imperfections │ The Printing Process for Long-Term Preservation │ Mixing Colors and Other Effects │ Creating Color Photographs from Negative Film… Equipment and Materials │ Exposing a Test Print │ Evaluating the Color Balance of a Printed Photograph
Chapter 8.
Basics of Digital Photography
Hardware and Software… Overview │ Saving Details… Resolution and Bit Depth │ Photos as Files… File Formats │ Channels… Color or Black and White │ Importing Images… Downloading from Camera or Scanner │ Scanning │ Setting Up a Workflow │ Workflow-Friendly Programs │ Photographers in the Field, Online Curator, Jim Casper
Chapter 9.
Image editing
Digital Post-Production: Getting Started… Choosing Software │ Workspace and Tools │ Image Editing Workflow… Step-by-Step Process │ Adjusting Shape… Crop and Rotate │ Adjusting Color and Value… Various Approaches │ Using Levels │ Curves │ Global and Local Retouching… Selection Tools │ Using Layers │ Other Editing Commands… High Dynamic Range │ Filters for Special Effects │ Sharpening │ Retouching │ Compositing │ Photographers on the Scene Retouching Shop, Scaleless & Villerial
Chapter 10.
digital printing
Printers and Printing… Choosing a Printer │ Drivers and RIPs │ Profiles and Softproofs │ Paper and Ink │ Printing Options… Panoramic Photos │ Black and White Photos │ Displaying Your Work… The Internet as a Gallery and Resource │ Ethical Issues: How Far Can You Go?
Chapter 11.
Organizing, Preserving and Displaying
Image storage… Size matters │ Metadata: Photo file information │ File organization software │ Preservation of digital images │ Preservation of film and prints │ Print mounting… Mounting equipment and materials │ Dry mounting │ Overmat cutting │ Frames and glass
Chapter 12.
lighting
Direction of light │ Diffusion: From hard to soft │ Available light… Outdoors │ Indoors │ Artificial light… Types and equipment │ Nature of artificial light │ Key light: Dominant element │ Fill light: Brightening shadows │ Flash lighting… Flash equipment │ Basic flash techniques │ Manual flash exposure │ Automatic flash exposure │ Fill flash to brighten shadows │ Background brightness │ Portraits with simple lighting │ Portraits with mixed lighting │ Lighting textured subjects │ Lighting reflectors │ Lighting translucency │ The use of light │ Photographers on the spot Dance photographer, Lois Greenfield
Chapter 13.
Image extension
Size of the work… Large and small │ Multiple images… The more the better │ The fictional world that became a photograph │ Text and image │ Photography as an object │ Using a projector │ Making a book │ Alternative printing techniques… Cyanotype │ Platinum and palladium │ Gum print │ Collodion and tintype │ Photogram: Photography without a camera │ Pinhole photography │ Close-up photography… Exposure of close-up photography │ Reproduction techniques
Chapter 14.
View camera
Inside the view camera │ Zone system │ Movement of the view camera… Rise and fall │ Shift │ Tilt │ Swing │ How to adjust the view camera image… Adjusting the focal plane │ Adjusting the perspective │ Required equipment │ Process before exposure │ How to load and develop sheet film
Chapter 15.
Viewing the photo
Basic choices… Content │ Framing │ Background │ Basic design… Points/lines │ Shapes/patterns │ Emphasis/balance │ More choices… Contrast of sharpness │ Contrast of light and dark │ Position of subject within frame │ Perspective and viewpoint │ Talking about the photo │ Presenting the work to editors and others
Chapter 16.
History of Photography
The invention of photography │ Daguerreotype: “painting on a shiny silver plate” │ Calotype: photography on paper │ Collodion wet plate: clarity and reproducibility │ Gelatin emulsion/roll film support: photography for everyone │ Color photography │ Early portraits │ Early travel photography │ Early war photography │ Time and movement in early photography │ Photography as a record │ Photography and social change │ Photojournalism │ Photography as art in the 19th century │ Painterly photography and the photo-secession movement │ Straight photography as art │ Exploration of new perspectives │ Photography as art in the 1950s and 1960s │ Photography as art in the 1970s and 1980s │ The reemergence of color photography │ Digital photography becoming mainstream │ Contemporary photography gallery
Troubleshooting Assistant
Glossary
References
Copyright List
Search
Chapter 1.
Getting started
Knowing Your Camera │ Preparing Your Camera │ Focusing and Exposure │ Taking Photos │ What to Shoot… A Basic Guide Before You Begin │ Portrait Photography │ Landscape Photography
Chapter 2.
camera
Camera Basics │ Shutter… Shutter and Light │ Shutter and Movement │ Freezing Movement into Pictures │ Aperture… Aperture and Light │ Aperture and Depth of Field │ Using Shutter and Aperture Together │ Choosing a Camera… Digital Cameras │ Film Cameras │ How to Hold Your Camera Steadily │ Photographer on the Scene, Photojournalist, Lindsey Addario
Chapter 3.
lens
From pinhole to lens │ Focal length of lenses… Standard lens │ Long focus lens │ Prime focus lens │ Zoom lens │ Special purpose lens │ Focusing… Manual focus │ Auto focus │ Focus and depth of field… Depth of field control │ Zone focusing │ Focusing at hyperfocal distance │ Perspective │ Lens buying tips │ How to get the most out of your camera and lenses │ Photographer in the field Art photographer, Alec Soth
Chapter 4.
Exposure, Sensor, and Film
Exposure Basics… Equivalent Exposure │ How Exposure Meters Work │ Built-in Camera Exposure Meters │ Automatic Exposure │ Exposure Metering Methods… Exposure Metering for Average-Tone Scenes │ How to Use Different Types of Exposure Meters │ Exposure Metering for High-Contrast Scenes │ Specific-Tone Exposure and Bracketing │ Scenes Where Exposure Metering is Difficult │ Histograms… Measurement in Digital Photography │ Three Histograms for Color Photography │ Exposure Latitude and Dynamic Range… How Much Can Exposure Vary? │ Photosensitive Materials… Grain and Pixels │ Choosing and Using Film │ Film and Sensor Sensitivity… Sensitivity and ISO │ Grain and Noise │ Using Filters │ Beyond Visible Light… Infrared Photography │ Exposure Utilization │ Photographer on the Scene, Advertising Photographer, Clint Clemens
Chapter 5.
Light and color
Additive and Subtractive Color │ Color Photography: The Three Image Layers │ The Characteristics of Color │ Color Balance… Color Changes Over Time │ Color Temperature │ Color Cast │ Mixed Lighting │ Color Modes and Color Gamut │ Color Management │ Color Adjustment on Film… Color Balance Filters │ Photographers on the Field Behind the Scenes of Sports, Walter Eus Jr.
Chapter 6.
Developing film
Developing Black and White Roll Film... Tools and Materials Needed for Developing | Types of Chemicals and How to Handle Them | Chemical Safety Precautions | Step-by-Step Guide to Developing Black and White Roll Film | How the Film Development Process Affects Your Photos | Exposure and Developing: Underexposure, Overexposure, and Overexposure
Chapter 7.
Developing in a darkroom
Black and White Printing… Printing Equipment and Materials │ Enlargers │ Photographic Paper │ A Step-by-Step Guide to Black and White Printing… Contact Prints: Seeing an Entire Roll of Film at Once │ Preparing for an Enlarged Print │ Test Strips │ Finished Prints after a Test Print │ The Black and White Printing Process │ Checking the Density and Contrast of a Printed Photograph │ Adjusting the Contrast… Graded and Multi-Tone Paper │ Dodging and Burning │ Spotting to Remove Small Imperfections │ The Printing Process for Long-Term Preservation │ Mixing Colors and Other Effects │ Creating Color Photographs from Negative Film… Equipment and Materials │ Exposing a Test Print │ Evaluating the Color Balance of a Printed Photograph
Chapter 8.
Basics of Digital Photography
Hardware and Software… Overview │ Saving Details… Resolution and Bit Depth │ Photos as Files… File Formats │ Channels… Color or Black and White │ Importing Images… Downloading from Camera or Scanner │ Scanning │ Setting Up a Workflow │ Workflow-Friendly Programs │ Photographers in the Field, Online Curator, Jim Casper
Chapter 9.
Image editing
Digital Post-Production: Getting Started… Choosing Software │ Workspace and Tools │ Image Editing Workflow… Step-by-Step Process │ Adjusting Shape… Crop and Rotate │ Adjusting Color and Value… Various Approaches │ Using Levels │ Curves │ Global and Local Retouching… Selection Tools │ Using Layers │ Other Editing Commands… High Dynamic Range │ Filters for Special Effects │ Sharpening │ Retouching │ Compositing │ Photographers on the Scene Retouching Shop, Scaleless & Villerial
Chapter 10.
digital printing
Printers and Printing… Choosing a Printer │ Drivers and RIPs │ Profiles and Softproofs │ Paper and Ink │ Printing Options… Panoramic Photos │ Black and White Photos │ Displaying Your Work… The Internet as a Gallery and Resource │ Ethical Issues: How Far Can You Go?
Chapter 11.
Organizing, Preserving and Displaying
Image storage… Size matters │ Metadata: Photo file information │ File organization software │ Preservation of digital images │ Preservation of film and prints │ Print mounting… Mounting equipment and materials │ Dry mounting │ Overmat cutting │ Frames and glass
Chapter 12.
lighting
Direction of light │ Diffusion: From hard to soft │ Available light… Outdoors │ Indoors │ Artificial light… Types and equipment │ Nature of artificial light │ Key light: Dominant element │ Fill light: Brightening shadows │ Flash lighting… Flash equipment │ Basic flash techniques │ Manual flash exposure │ Automatic flash exposure │ Fill flash to brighten shadows │ Background brightness │ Portraits with simple lighting │ Portraits with mixed lighting │ Lighting textured subjects │ Lighting reflectors │ Lighting translucency │ The use of light │ Photographers on the spot Dance photographer, Lois Greenfield
Chapter 13.
Image extension
Size of the work… Large and small │ Multiple images… The more the better │ The fictional world that became a photograph │ Text and image │ Photography as an object │ Using a projector │ Making a book │ Alternative printing techniques… Cyanotype │ Platinum and palladium │ Gum print │ Collodion and tintype │ Photogram: Photography without a camera │ Pinhole photography │ Close-up photography… Exposure of close-up photography │ Reproduction techniques
Chapter 14.
View camera
Inside the view camera │ Zone system │ Movement of the view camera… Rise and fall │ Shift │ Tilt │ Swing │ How to adjust the view camera image… Adjusting the focal plane │ Adjusting the perspective │ Required equipment │ Process before exposure │ How to load and develop sheet film
Chapter 15.
Viewing the photo
Basic choices… Content │ Framing │ Background │ Basic design… Points/lines │ Shapes/patterns │ Emphasis/balance │ More choices… Contrast of sharpness │ Contrast of light and dark │ Position of subject within frame │ Perspective and viewpoint │ Talking about the photo │ Presenting the work to editors and others
Chapter 16.
History of Photography
The invention of photography │ Daguerreotype: “painting on a shiny silver plate” │ Calotype: photography on paper │ Collodion wet plate: clarity and reproducibility │ Gelatin emulsion/roll film support: photography for everyone │ Color photography │ Early portraits │ Early travel photography │ Early war photography │ Time and movement in early photography │ Photography as a record │ Photography and social change │ Photojournalism │ Photography as art in the 19th century │ Painterly photography and the photo-secession movement │ Straight photography as art │ Exploration of new perspectives │ Photography as art in the 1950s and 1960s │ Photography as art in the 1970s and 1980s │ The reemergence of color photography │ Digital photography becoming mainstream │ Contemporary photography gallery
Troubleshooting Assistant
Glossary
References
Copyright List
Search
Detailed image

Into the book
Newer cameras automatically adjust exposure and focus.
However, many photographers still prefer to manually control exposure and focus.
Even those who teach photography often encourage their students to take photos manually to familiarize themselves with basic operations.
In this chapter, we will explain both manual and automatic operation.
--- 「Chapter 1.
From "Getting Started"
How to photograph a landscape? The most important questions are, "What will you remember?" and "What story will you convey to those who haven't been there?"
What are the best and worst aspects of that place? Do you want a grand view or a close-up of just a portion of the landscape? What feeling did you get from the place? Look at a scene from different angles, walk around, and see it from different vantage points.
Come closer or step back and look from a distance.
As you get closer, even a slight change in camera position will affect the relationship between the subject and the background.
By changing the photographer's point of view and the subject's position, you may be able to see things you didn't see at first.
--- 「Chapter 1.
Getting Started, from “What to Shoot: Landscape Photography”
A standard lens feels like the human eye.
Henri Cartier-Bresson, one of the greatest modern photographers who called the camera an "extension of the eye," frequently used standard lenses.
…most standard lenses have a wide maximum aperture, allowing them to use faster shutter speeds in low light than other lenses.
It is also inexpensive, small in size and lightweight.
Choosing a focal length is a matter of personal preference.
Some photographers prefer prime lenses because they want a wide angle of view, while others often use long lenses to highlight their subject with a narrow angle of view.
If you're not sure which is better, start with a standard lens.
--- Chapter 3.
Lens, from “Focal length of lens: standard lens”
Most camera built-in exposure meters are both average and center-weighted.
The exposure meter automatically averages the light within the screen, but also places greater emphasis on the center of the screen.
This method is based on the assumption that the most important subject is located in the center of the screen, but this is not necessarily the case.
So if your main subject is not in the center of the screen, it may give you an incorrect exposure value.
…most exposure meters measure the average of the bright and dark areas to create a mid-gray tone.
In a scene with mostly bright tones, such as a snowy landscape, the light meter calculates an average value as middle gray.
The result is a dark, underexposed photo.
On the next page, we'll learn how to identify such scenes and how to set up your camera.
--- 「Chapter 4.
Exposure, Sensors, and Film, from “Exposure Basics: Camera-Built Exposure Meters”
When shooting with film, after exposing the entire roll of film, the next step is to make the captured image visible.
The image is created the moment the shutter closes after exposure.
However, at this stage, you cannot view the image directly.
The image exists, but it is in a potential state that is temporarily invisible.
Only after developing and printing the film can you enjoy the images, and the amount of enjoyment you get depends on how much effort you put into developing the film.
…the black and white development technique is simple.
Practice following the general development process, but be careful not to get any dust, stains, or scratches.
The techniques needed for successful film development are easy to acquire, and the tools needed for film development are readily available.
--- 「Chapter 6.
From “Developing Film”
If you are choosing photo paper for the first time, it is recommended to purchase a set that includes multi-tone, gloss, and resin-coated (RC) photo paper.
…many photographers prefer glossy paper with a soft texture because it has the best tonal range and gloss.
Normally, photographs are viewed in reflected light, but matte surfaces or rough textures scatter light and reduce the gradation between the darkest black areas and the brightest highlights.
--- Chapter 7.
Developing in a darkroom, from “Black and White Development: Photographic Paper”
I primarily use Adobe Photoshop as an image editing program at school and in my studio, but recently I've been using Adobe Photoshop Lightroom more frequently as a workflow application.
Elements, a limited-feature version of Photoshop (and a cheaper version), also has most of the editing features you'll need.
The post-production steps covered in this chapter can be performed with any program unless specifically mentioned.
Most software offers free trial versions, so read this chapter carefully to find out which one is right for you.
--- Chapter 9.
Image Editing, from “Getting Started with Digital Post-Production: Choosing Software”
Taking photos and viewing them on a screen is fun, but printing them out and seeing the results can be even more rewarding.
…digital printing is much easier to learn than darkroom development, but it still requires capture or scanning to bring the photographer's interpretation to life.
Just as plaster must be shaped by the hands of a sculptor.
Digital images are much simpler to print, reproduce, and retouch.
Instead, it is easy to steal or alter the image for purposes other than its intended purpose.
You should always keep the degree in mind.
--- Chapter 10.
From “Digital Printing”
Photographic materials are best preserved in a cool place with a humidity of around 40%.
…negative film can cause even more problems.
Accurately processed black and white film has only three components:
Silver salt, gelatin, and plastic support layers.
Polyester used in the film support layer is very stable and has little reaction to the surrounding environment.
However, silver salts are particularly sensitive to air pollution containing sulfur compounds, and gelatin is susceptible to insects and mold.
Color slides, color negatives, and color prints processed in a darkroom have a shorter shelf life than black and white.
It is especially important to store these types in a cool, dark, and stable place.
--- 「Chapter 11.
Organizing, Preserving and Exhibiting, from “Preservation of Film and Prints”
When shooting indoors, focus on exposing the most important parts.
Because our eyes adapt well to their environment, we can quickly see details even when we look at a bright area and then look at a dark area around it.
However, because indoors typically have a greater range of contrast than film can record, you should expose for the areas where you want detail rather than measuring the overall exposure.
Indoor lighting is usually dim.
If you are shooting indoors with the existing light, without using supplemental lighting, you will need to use a wide open aperture and a slow shutter speed.
When shooting at a slow shutter speed, use a tripod or place the camera on a table to avoid blurring the photo.
When you open the aperture too much, the depth of field becomes shallow, so you have to focus carefully.
Setting the sensitivity higher or using film rated at ISO 400 or higher can help.
--- 「Chapter 12.
Lighting, from “Usable Light: Indoors”
Alternative techniques such as cyanotype, platinum and palladium were popular in the 19th century and required a negative the same size as the final print.
There are several ways to create negatives of the same size.
You can simply copy your original negative onto a large film.
Alternatively, you can print in large size on transparent film using an inkjet printer.
Digitally created negatives allow for precise control of contrast and density, which is particularly useful in cyanotypes, where the only way to control contrast is to alter the negative itself.
--- 「Chapter 13.
Extension of the image, from “Alternative printing techniques”
Why do photographers use view cameras that are bulky, heavy, and often incapable of rapid shooting? View cameras have little or no automatic functions, require a tripod, produce images that appear upside-down, and sometimes even appear dark, requiring photographers to observe through a black cloth covering the camera and head.
However, the reason view cameras are used is because they provide features that are worth enduring these inconveniences.
The movement of the view camera allows the photographer to control the entire image.
The back (the side with the image or film) and front (the side with the lens) of the camera can move freely in any direction, up and down, side to side, forward and backward, or tilt.
…large film format is also an advantage of view cameras.
…images captured on large negatives have exceptional sharpness and detail, and very little grain or noise.
--- 「Chapter 14.
Among the "view cameras"
Smith's curator, Elizabeth Kay, advises him to continue showing his work in galleries.
“It’s not easy for anyone to just walk into a gallery and show their work.
But keep trying, compile a summary of your work, collect news articles about yourself, add galleries to your mailing list, and keep sending them emails about exhibitions and such.
It is important to let them know what you are doing.
Just as there are many galleries, there are many different types of people.
It may take some time to find the right person for you.
“Be persistent and keep working hard.”
However, many photographers still prefer to manually control exposure and focus.
Even those who teach photography often encourage their students to take photos manually to familiarize themselves with basic operations.
In this chapter, we will explain both manual and automatic operation.
--- 「Chapter 1.
From "Getting Started"
How to photograph a landscape? The most important questions are, "What will you remember?" and "What story will you convey to those who haven't been there?"
What are the best and worst aspects of that place? Do you want a grand view or a close-up of just a portion of the landscape? What feeling did you get from the place? Look at a scene from different angles, walk around, and see it from different vantage points.
Come closer or step back and look from a distance.
As you get closer, even a slight change in camera position will affect the relationship between the subject and the background.
By changing the photographer's point of view and the subject's position, you may be able to see things you didn't see at first.
--- 「Chapter 1.
Getting Started, from “What to Shoot: Landscape Photography”
A standard lens feels like the human eye.
Henri Cartier-Bresson, one of the greatest modern photographers who called the camera an "extension of the eye," frequently used standard lenses.
…most standard lenses have a wide maximum aperture, allowing them to use faster shutter speeds in low light than other lenses.
It is also inexpensive, small in size and lightweight.
Choosing a focal length is a matter of personal preference.
Some photographers prefer prime lenses because they want a wide angle of view, while others often use long lenses to highlight their subject with a narrow angle of view.
If you're not sure which is better, start with a standard lens.
--- Chapter 3.
Lens, from “Focal length of lens: standard lens”
Most camera built-in exposure meters are both average and center-weighted.
The exposure meter automatically averages the light within the screen, but also places greater emphasis on the center of the screen.
This method is based on the assumption that the most important subject is located in the center of the screen, but this is not necessarily the case.
So if your main subject is not in the center of the screen, it may give you an incorrect exposure value.
…most exposure meters measure the average of the bright and dark areas to create a mid-gray tone.
In a scene with mostly bright tones, such as a snowy landscape, the light meter calculates an average value as middle gray.
The result is a dark, underexposed photo.
On the next page, we'll learn how to identify such scenes and how to set up your camera.
--- 「Chapter 4.
Exposure, Sensors, and Film, from “Exposure Basics: Camera-Built Exposure Meters”
When shooting with film, after exposing the entire roll of film, the next step is to make the captured image visible.
The image is created the moment the shutter closes after exposure.
However, at this stage, you cannot view the image directly.
The image exists, but it is in a potential state that is temporarily invisible.
Only after developing and printing the film can you enjoy the images, and the amount of enjoyment you get depends on how much effort you put into developing the film.
…the black and white development technique is simple.
Practice following the general development process, but be careful not to get any dust, stains, or scratches.
The techniques needed for successful film development are easy to acquire, and the tools needed for film development are readily available.
--- 「Chapter 6.
From “Developing Film”
If you are choosing photo paper for the first time, it is recommended to purchase a set that includes multi-tone, gloss, and resin-coated (RC) photo paper.
…many photographers prefer glossy paper with a soft texture because it has the best tonal range and gloss.
Normally, photographs are viewed in reflected light, but matte surfaces or rough textures scatter light and reduce the gradation between the darkest black areas and the brightest highlights.
--- Chapter 7.
Developing in a darkroom, from “Black and White Development: Photographic Paper”
I primarily use Adobe Photoshop as an image editing program at school and in my studio, but recently I've been using Adobe Photoshop Lightroom more frequently as a workflow application.
Elements, a limited-feature version of Photoshop (and a cheaper version), also has most of the editing features you'll need.
The post-production steps covered in this chapter can be performed with any program unless specifically mentioned.
Most software offers free trial versions, so read this chapter carefully to find out which one is right for you.
--- Chapter 9.
Image Editing, from “Getting Started with Digital Post-Production: Choosing Software”
Taking photos and viewing them on a screen is fun, but printing them out and seeing the results can be even more rewarding.
…digital printing is much easier to learn than darkroom development, but it still requires capture or scanning to bring the photographer's interpretation to life.
Just as plaster must be shaped by the hands of a sculptor.
Digital images are much simpler to print, reproduce, and retouch.
Instead, it is easy to steal or alter the image for purposes other than its intended purpose.
You should always keep the degree in mind.
--- Chapter 10.
From “Digital Printing”
Photographic materials are best preserved in a cool place with a humidity of around 40%.
…negative film can cause even more problems.
Accurately processed black and white film has only three components:
Silver salt, gelatin, and plastic support layers.
Polyester used in the film support layer is very stable and has little reaction to the surrounding environment.
However, silver salts are particularly sensitive to air pollution containing sulfur compounds, and gelatin is susceptible to insects and mold.
Color slides, color negatives, and color prints processed in a darkroom have a shorter shelf life than black and white.
It is especially important to store these types in a cool, dark, and stable place.
--- 「Chapter 11.
Organizing, Preserving and Exhibiting, from “Preservation of Film and Prints”
When shooting indoors, focus on exposing the most important parts.
Because our eyes adapt well to their environment, we can quickly see details even when we look at a bright area and then look at a dark area around it.
However, because indoors typically have a greater range of contrast than film can record, you should expose for the areas where you want detail rather than measuring the overall exposure.
Indoor lighting is usually dim.
If you are shooting indoors with the existing light, without using supplemental lighting, you will need to use a wide open aperture and a slow shutter speed.
When shooting at a slow shutter speed, use a tripod or place the camera on a table to avoid blurring the photo.
When you open the aperture too much, the depth of field becomes shallow, so you have to focus carefully.
Setting the sensitivity higher or using film rated at ISO 400 or higher can help.
--- 「Chapter 12.
Lighting, from “Usable Light: Indoors”
Alternative techniques such as cyanotype, platinum and palladium were popular in the 19th century and required a negative the same size as the final print.
There are several ways to create negatives of the same size.
You can simply copy your original negative onto a large film.
Alternatively, you can print in large size on transparent film using an inkjet printer.
Digitally created negatives allow for precise control of contrast and density, which is particularly useful in cyanotypes, where the only way to control contrast is to alter the negative itself.
--- 「Chapter 13.
Extension of the image, from “Alternative printing techniques”
Why do photographers use view cameras that are bulky, heavy, and often incapable of rapid shooting? View cameras have little or no automatic functions, require a tripod, produce images that appear upside-down, and sometimes even appear dark, requiring photographers to observe through a black cloth covering the camera and head.
However, the reason view cameras are used is because they provide features that are worth enduring these inconveniences.
The movement of the view camera allows the photographer to control the entire image.
The back (the side with the image or film) and front (the side with the lens) of the camera can move freely in any direction, up and down, side to side, forward and backward, or tilt.
…large film format is also an advantage of view cameras.
…images captured on large negatives have exceptional sharpness and detail, and very little grain or noise.
--- 「Chapter 14.
Among the "view cameras"
Smith's curator, Elizabeth Kay, advises him to continue showing his work in galleries.
“It’s not easy for anyone to just walk into a gallery and show their work.
But keep trying, compile a summary of your work, collect news articles about yourself, add galleries to your mailing list, and keep sending them emails about exhibitions and such.
It is important to let them know what you are doing.
Just as there are many galleries, there are many different types of people.
It may take some time to find the right person for you.
“Be persistent and keep working hard.”
--- 「Chapter 15.
From “Presenting Your Work to Editors and Others” in “Viewing Photos”
From “Presenting Your Work to Editors and Others” in “Viewing Photos”
Publisher's Review
If you have a camera, you must also have 『photos』!
Photography is constantly changing, and 『Photography』 reflects that change with each version.
A lot has changed over time: from film to digital, from manual to automatic, from black and white to color.
But the fundamental goal of this book remains unchanged: to understand how photographs are made, what controls the process, and how photographers apply what and how to achieve their creative goals.
The 12th edition, which commemorates the 40th anniversary of 『Photography』, which has been a 'bible' since its first publication in 1976, includes not only information on traditional photographic tools, production processes, and techniques, but also methods for taking, developing, and printing film photographs, as well as methods for capturing, processing, transmitting, printing, and storing them electronically.
Chapters 1-5 cover general photography techniques and camera usage, including digital and film cameras, lenses, sensors and film, exposure and color theory and practice.
Chapters 6 and 7 are new material not found in previous editions and are intended for readers who use film.
In addition to black-and-white film development and darkroom printing methods, it also provides detailed information on equipment and safety rules.
Chapters 8-11 cover contemporary digital photography.
Beginners will learn the basics of loading images onto a computer, editing and printing them, as well as how to store digital files and build systems for efficient retrieval.
In addition to the mounting process and exhibition methods, it also includes information on darkroom production and digitally created permanent preservation prints.
In particular, we provide guidance on how to use the latest workflow programs, Capture One Pro and Lightroom CC, with example images so that you can start using them right away.
Chapters 12 and 13 cover lighting techniques, ways to expand the use of photographic media, and special production techniques such as pinhole cameras, cyanotypes, and gum prints.
Chapter 14 is also a new chapter, and it explains how to use and use a film view camera, while exploring how to achieve the best results.
Chapters 15 and 16 examine historically significant photographs and contemporary notable photographs, and explore why these works are so successfully evaluated.
Furthermore, we will examine several factors that can help your work to be successful and attract attention.
The appendix, “Troubleshooting Helper,” contains a collection of problem-solving methods grouped together with photos.
In the “Photographers in the Field” section of the text, you can discover diverse trends in contemporary photography and gain inspiration by reading the stories of active photographers.
In addition, we aimed to provide useful resources and help with understanding through “Glossary” and “References”.
In terms of structure, one explanation is included on two facing pages to help you understand the content at a glance. The topic sentence is written in bold, and the work process is organized into steps so that even beginners can easily follow along.
Covering both analog and digital work, the 12th edition of 『Photography』 provides up-to-date information and is an essential guidebook for anyone with a camera or an interest in photography.
Photography is constantly changing, and 『Photography』 reflects that change with each version.
A lot has changed over time: from film to digital, from manual to automatic, from black and white to color.
But the fundamental goal of this book remains unchanged: to understand how photographs are made, what controls the process, and how photographers apply what and how to achieve their creative goals.
The 12th edition, which commemorates the 40th anniversary of 『Photography』, which has been a 'bible' since its first publication in 1976, includes not only information on traditional photographic tools, production processes, and techniques, but also methods for taking, developing, and printing film photographs, as well as methods for capturing, processing, transmitting, printing, and storing them electronically.
Chapters 1-5 cover general photography techniques and camera usage, including digital and film cameras, lenses, sensors and film, exposure and color theory and practice.
Chapters 6 and 7 are new material not found in previous editions and are intended for readers who use film.
In addition to black-and-white film development and darkroom printing methods, it also provides detailed information on equipment and safety rules.
Chapters 8-11 cover contemporary digital photography.
Beginners will learn the basics of loading images onto a computer, editing and printing them, as well as how to store digital files and build systems for efficient retrieval.
In addition to the mounting process and exhibition methods, it also includes information on darkroom production and digitally created permanent preservation prints.
In particular, we provide guidance on how to use the latest workflow programs, Capture One Pro and Lightroom CC, with example images so that you can start using them right away.
Chapters 12 and 13 cover lighting techniques, ways to expand the use of photographic media, and special production techniques such as pinhole cameras, cyanotypes, and gum prints.
Chapter 14 is also a new chapter, and it explains how to use and use a film view camera, while exploring how to achieve the best results.
Chapters 15 and 16 examine historically significant photographs and contemporary notable photographs, and explore why these works are so successfully evaluated.
Furthermore, we will examine several factors that can help your work to be successful and attract attention.
The appendix, “Troubleshooting Helper,” contains a collection of problem-solving methods grouped together with photos.
In the “Photographers in the Field” section of the text, you can discover diverse trends in contemporary photography and gain inspiration by reading the stories of active photographers.
In addition, we aimed to provide useful resources and help with understanding through “Glossary” and “References”.
In terms of structure, one explanation is included on two facing pages to help you understand the content at a glance. The topic sentence is written in bold, and the work process is organized into steps so that even beginners can easily follow along.
Covering both analog and digital work, the 12th edition of 『Photography』 provides up-to-date information and is an essential guidebook for anyone with a camera or an interest in photography.
GOODS SPECIFICS
- Publication date: December 25, 2019
- Page count, weight, size: 432 pages | 1,448g | 230*280*18mm
- ISBN13: 9788940805923
- ISBN10: 8940805925
You may also like
카테고리
korean


korean

![GQ KOREA Mark (Monthly): December [2025]](http://librairie.coreenne.fr/cdn/shop/files/8ef265dbbfbf186523ed75ba7319009d.jpg?v=1765340328&width=3840)


